Hi All Qtpfsgui Fans - I've spent a great deal of time working with this infuriating but powerful software. There is not really very much information from the coders and authors for users like me. So I started to put some notes together on how to use the various Tone Mapping Operators or TMO's and on how they work. However, this is turning into a substantial task, and I thought I would post them in serial form for comments, additions, and so on.
At some point I may tackle the way in which Qtpfsgui tackles the creation of HDR files - there are several options that can give different results.
This first post gives some info on the initial set up required to run the TMO's, and then discusses the easiest(?) TMO - Drago.
One key point to understand about Qtpfsgui is that the software is or should be a platform for the testing, refining and use of HDR creation and TMO's. Thus, unlike commercial software such as Photomatix and plugins for Photoshop etc, Qtpfsgui is unique. Despite its drawbacks and frustrations it deserves support.
Qtpfsgui Drago Notes
Test Image: Test1.hdr (Hass Burn images 357, 359, 361, April 2009 copyright DARW)
Initial Set-Up:
Three images with exposure settings of -2, 0, and +2 stops (constant Av, variable Tv) were captured as RAW files on a Canon 40D camera fitted with a Canon 24-105 mm EF zoom lens. These files were converted using Canon's Digital Photo Professional (DPP) software to create 3 corresponding TIFF files. For the purposes of this exercise no other processing was carried out on the files using DPP. The TIFF files were loaded into Qtpfsgui (v. 1.9.3) via the“Create New HDR” option and combined via that software's Profile 1 to create a high dynamic range image, stored as an “.hdr” file. For this exercise, this HDR file is called HDRTestFile1.hdr and it is available from
http://uploading.com/files/85TOG1VK/...File1.hdr.html
Others may then check whether they obtain the same results as reported here.
Note that the conversion of RAW files (or their corresponding files from other camera systems) to TIFF files is desirable when using Qtpfsgui for two reasons. First, subsequent processing is far quicker than using RAW files directly. Second, the RAW conversion algorithm built into Qtpfsgui, based on work by D C Coffin, while good, requires some settings to be adjusted in the Preferences menu. This in turn requires the operator to know about such settings and requires reference to DC Coffin's homepage, and so on.
The Tone-Mapping Panel
In version 1.9.3, the tone-mapping panel for Qtpfsgui shows, on the left-hand side, a drop-down menu from which a tone-mapping operator can be picked. There are 8 such operators listed. Below this menu there is a panel that displays the parameters associated with each operator, “save and load” options for parameters used, and a “process” panel displaying the size of the resulting image, a “pre-gamma” slider, and an “apply” button.
Regarding the result image, note that using a small size (the default is 256x384) is helpful for fast processing However, when a final selection of parameters has been chosen, the user must increase the result size to whatever level is needed for the final image, e.g. 2592 x3988. For this exercise, an working image size of 512x768 pixels was used, scaled up to 2592x3988 for saved images. Processing times on this computer are about 2-3 seconds for the 512x768 image and about 15 seconds for the 2592x3988 image. The images are saved as JPEG files.
The “pre-gamma” function is important; however its nature is not explained well in Qtpfsgui documents. Here is what the manual states: “Pregamma changes the gamma in the HDR before the tone mapping: depending on the chosen tone mapping operator this can yield unexpected effects, like color saturation.” As far as these notes are concerned pre-gamma changes the brightness of the HDR image prior to tone-mapping. Further comments may be in a subsequent post. However,
overall, the pre-gamma setting can have an influence on the processed image. Its effect for individual operators is discussed in context.
Finally, note that in the menu bar there is an “Adjust Levels” option. This can be used to check the nature of the histogram of a processed image as well as to adjust the overall levels of the result. Compared to levels controls in other, commercial, software and in the GIMP, this control is basic, but nevertheless very useful.
The Drago Tone-Mapping Operator
This is the simplest tone-mapping operator (TMO) presented in Qtpfsgui, in that it has only one control, Bias, with default set at 0.85, and a range from 0.50 to 1.00. The following points are the results of an empirical approach to testing the Drago operator, i.e. a “suck-it-and-see” approach, with a view to producing, firstly, a realistic image and, secondly, an over-the-top or OTT image. In addition, any characteristic feature of the TMO is noted.
The default settings give a realistic image, but the image appears washed out, lacking good contrast. Increasing the Bias is said to increase the dynamic range. Setting Bias to 1.00 certainly gives more contrast in the light areas, but darkens the lower tones. Setting Bias to 0.50 (its lowest value) gives good low tonal values, but blows the lights. Mid tones lack contrast. Saving images at each extreme of Bias could give a good image via blending.
Returning to the default setting for Bias of 0.85, and lowering the pre-gamma setting to 0.5 gives a more colourful (saturated) and contrasty image, although the dark tones are now missing detail. Setting pre-gamma to 0.3 or lower results in unrealistic images. Setting pre-gamma above 1.0 gives ever increasingly greyed out images.
Again with Bias set at 0.85 and pre-gamma at 1.0, inspection of the histogram via the Adjust Levels tool shows the black end of the histogram needs to be moved, in this case to a setting of about 40. The white end looks fine with no clipping. The gamma setting can also be adjusted if necessary. Note that changes are shown interactively on the displayed image. However, to my eye, some of the dark areas are now clipped.
Looking at the image with a pre-gamma of 0.5 via its histogram, there is a good range of tonal values. No further adjustment appears necessary.
Conclusion: This is a fast TMO with only one parameter to adjust within the operator itself, Bias. Decreasing the pre-gamma value to about 0.5 from its default of 1.0 gives rise to realistic images with good contrast and saturation. Unrealistic images can be produced by lowering the pre-gamma value to 0.3 or less. There is no obvious characteristic feel to or result from this TMO, but the nature of the algorithm leads to poor detail in dark tones. Given its ease of use, the Drago TMO is worthwhile for basic or default images that may be saved for further processing via other image software, or kept within a Qtpfsgui session for comparison with the results of images from other TMO methods..
Technical Points: The authors of the algorithm (F Drago, K Myszkowski, T Annen and N Chiba, 2003) aver that the TMO imitates the response of the human eye. They state, “The method is based on logarithmic compression of luminance values, imitating the human response to light. A bias power function is introduced to adaptively vary logarithmic bases, resulting in good preservation of details and contrast.”
(http://www.mpi-inf.mpg.de/resources/...map/logmap.pdf and http://www.mpi-inf.mpg.de/resources/tmo/logmap/ )
The idea of tone-mapping is to map a large range of values (the floating point range created from the calculation of the HDR image) onto a smaller range (0-255 integer range for each colour value). In this TMO, the way that this is accomplished is to map using a logarithmic function. (A high floating point number has a much lower value as a logarithm.) However, if a simple logarithm, say to the base 10, were to be used, then parts of the image would be too light and parts too dark. Thus, Drago et al. use a variable logarithmic base to do the mapping. The Bias parameter is the variable that controls the variation in logarithmic base.
From reading the Drago et al. paper, the variations in brightness and contrast noted above are in line with those reported by the authors. According to the paper, one of the constants used in the calculations (Ldmax) is based on a common reference value for CRT monitors (100cd/m2). Whether this has any importance for TFT monitors is not clear.
Sources:
http://qtpfsgui.sourceforge.net/
http://qtpfsgui.sourceforge.net/documentation.php
http://qtpfsgui.wiki.sourceforge.net...7bd1340b571711
http://osp.wikidot.com/parameters-for-photographers
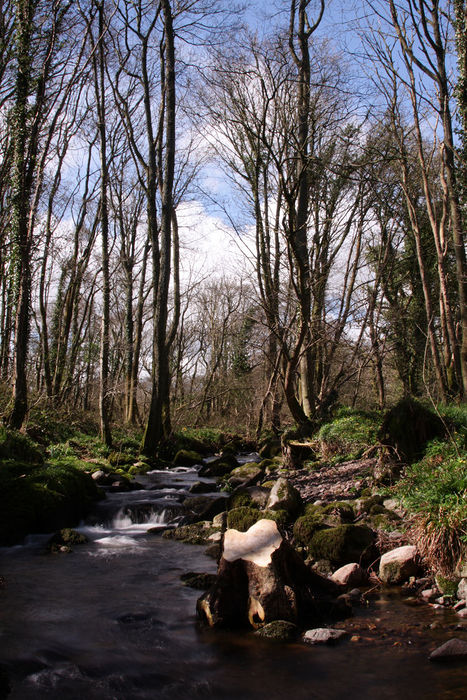
The original image with relative exposure setting of 0 is:
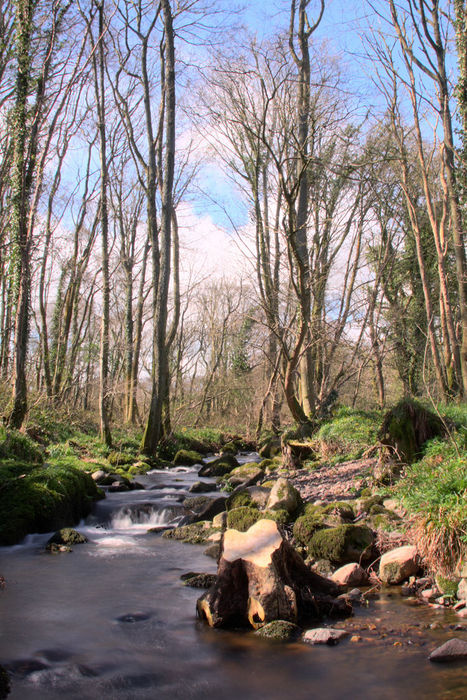
and a reasonable Drago image is:
Comments and crits welcome
David
Results 1 to 2 of 2
-
10th May 2009, 10:17 AM #1
Qtpfsgui Notes - Set-Up and Drago
Last edited by David; 10th May 2009 at 12:17 PM. Reason: Long complex post (at least for me).
-
11th May 2009, 11:47 PM #2
Re: Qtpfsgui Notes - Set-Up and Drago
Thanks very much for that, seems like you've put a lot of effort in there and no doubt many will appreciate that (I certainly do). Hopefully you may get the ball rolling with regard to tutorials and documentation of features as it seems like a very promising application but like you say hard to find how to use it. Perhaps in the future the official site will start a decent wiki like some foss projects that have got their act together in terms of project direction, release planning and documentation. Failing that you could always start a wiki for the project.
Sadly many otherwise brilliant applications are left as an untapped resource because everything goes into development and code side and nothing into support etc.So many promising opensource things have little info that is of use and there are a few apps I use regularly that give nothing in the way of documentation or help aside from typing the --help argument and figuring out from that by trial and error. Problem is many coders and the like technical devs behind stuff aren't great at pitching it to the larger audience so unless you are in that field yourself and have the assumed knowledge and don't mind lack of polished interfaces and a steep learning curve it's not always most peoples idea of fun. Big proprietary devs understand people don't want to learn how or why it works in detail but just want it to work, things are improving though as many projects start to be picked up by the mainstream.

 Helpful Posts:


 Reply With Quote
