
Hello CiC members,
This is my first attempt with RAW format, and post editing with CPP(Canon Photo...)
I read tutorials, treads, but finally I just moved the sliders
Please criticize
Thanks
Dora
 Helpful Posts: 0
Results 1 to 9 of 9
Thread: Raw shooting - first attempt
-
18th May 2011, 03:43 AM #1

- Join Date
- May 2011
- Location
- Ottawa, Canada
- Posts
- 231
- Real Name
- Dora B
Raw shooting - first attempt
-
18th May 2011, 03:48 AM #2

- Join Date
- Aug 2009
- Location
- Melbourne, Australia
- Posts
- 1,968
- Real Name
- Peter
Re: Raw shooting - first attempt
Hi Dora and welcome to CiC,
As this is more about shooting and processing in RAW I willlimit my initial comments to that.
I have managed the exposure pretty well really but the imagelacks a little in the contrast and sharpening, which will bring out more detailin the flowers and allow them to stand out more against the background (whichis a little cluttered really).
I do not know CPP so cannot advise you on how to add contrasand sharpening in that program but others will have used it and I am sure willchime in.
-
18th May 2011, 03:58 AM #3rob marshall
Re: Raw shooting - first attempt
Hi Dora, and welcome to CiC.
Did you mean Digital Photo Pro (DPP)? It's not a bad converter, but not quite as sophisticated as Photoshop. But many photographers find it pretty good.
About the shot - The Magnolias are nice flowers and they are well exposed. But the whole shot has a little too much detail. It's hard to isolate the flower(s) from everything else. I find it best to keep some background detail to provide context, but to try and minimize it as much as possible. You could have used f/4 instead of f/11. Try to avoid two subjects (flowers in this case) unless they are very close together, as the viewer is torn between the two.
ISO3200 is very high for a Rebel - try to get it lower.
-
19th May 2011, 11:43 PM #4
- Join Date
- May 2011
- Location
- Ottawa, Canada
- Posts
- 231
- Real Name
- Dora B
Re: Raw shooting - first attempt
Thank you Bob and Peter - I agree, the magnolias are superb but my tree is in the backyard, surrounded by big trees, so I don't have to much light there(plus murky days for 2 weeks in a row).The Magnolias are nice flowers
My little understanding of that famous exposure triangle pushed me to use ISO 3200 but yes, I agree is to high.
Here is a jpeg shot with a minimum of editing. Is it better like that? Thank you for your help.

-
20th May 2011, 01:45 AM #5

- Join Date
- Nov 2010
- Location
- Manila, Philippines
- Posts
- 3,804
- Real Name
- Willie or Jiro is fine by me.
Re: Raw shooting - first attempt
I find this image better than the first one you posted, Dora. For one thing, you now have a definite main subject and a less cluttered background. RAW image are typically like this, that is why you need some post-processing to make it alive and with pop. Originally Posted by dulceza

I find your image a little bit overexposed so I would probably do an exposure adjustment and lower it a little bit. The highlights (white or very bright areas) are a bit blown (you lost some texture or detail on those areas) so I might go and adjust it by lowering it down to recover details on those parts. Your image also need some boost on the contrast to increase the density of the image and lastly, some color saturation adjustment I think would be beneficial. Here's a fast edit on the last image for comparison.
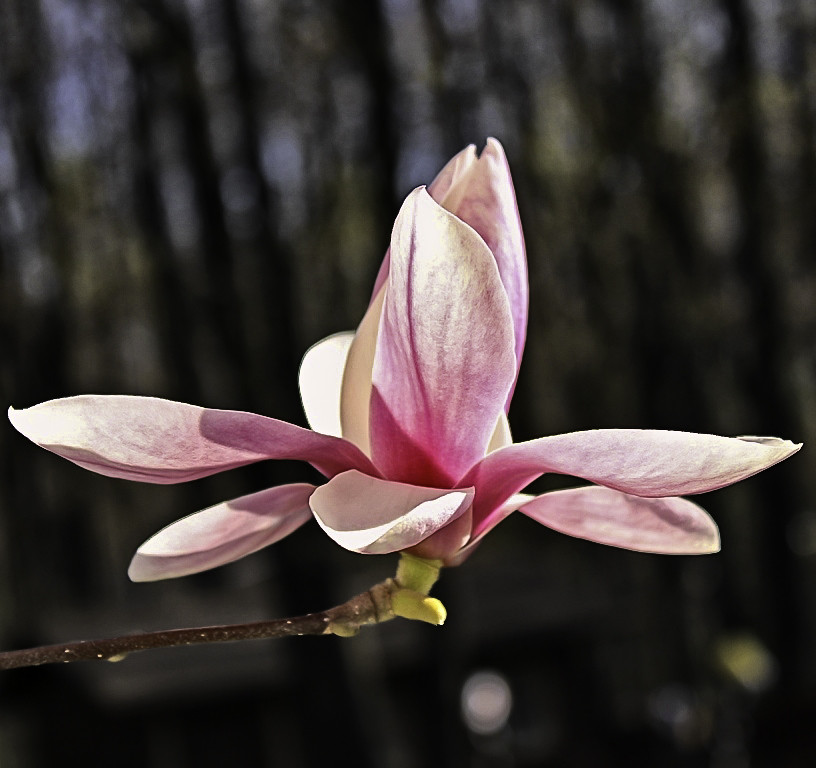
I applied all the adjustments that I explained above plus on the final edit, I darkened the background for better contrast and also sharpened the whole image prior to uploading. Hope this helps. You did pretty good with this one.
-
21st May 2011, 01:41 AM #6
- Join Date
- May 2011
- Location
- Ottawa, Canada
- Posts
- 231
- Real Name
- Dora B
Re: Raw shooting - first attempt
Thank you Jiro for your magical touch. I read somewhere here that there are no such dumb questions on Cambridge forums - so this is my wonder: how did you darkened just the background - I just moved the sliders for now, but the whole image was modified.
On another note, I would like to tell you that I find your work truly inspirational .
-
21st May 2011, 01:52 AM #7
- Join Date
- Nov 2010
- Location
- Manila, Philippines
- Posts
- 3,804
- Real Name
- Willie or Jiro is fine by me.
Re: Raw shooting - first attempt
If you use photoshop like me, you add a "Curve adjustment" layer on top of your image then you grab the middle line of the curve and pull it down. That would make the whole image really dark. Since you don't want to make the flower (which is your main subject) dark, too you have to apply a black colored brush on the "curve adjustment layer" mask so that the darkening will not affect anything or any part of the image where you apply the dark brush on. Originally Posted by dulceza
I'll see if I can make a simple tutorial about this later to help you out. Thanks.
-
21st May 2011, 02:14 AM #8
- Join Date
- Nov 2010
- Location
- Manila, Philippines
- Posts
- 3,804
- Real Name
- Willie or Jiro is fine by me.
Re: Raw shooting - first attempt
With much apologies, Dora. I forgot to realize that you're using Canon Digital Photo Pro as your editing software. I'm downloading a copy now from Canon USA and I'll see if it has layer capabilities. Sorry.

-
21st May 2011, 05:17 AM #9rob marshall
Re: Raw shooting - first attempt
It doesn't. Or at least it didn't the last time I looked. Photoshop is always going to have the edge in PP. It has had so much investment and development put into it compared to other products. That's why most people use it. Originally Posted by jiro


 Reply With Quote