Colin - I actually generally try to avoid the centre framing but for some reason I thought I liked this. But having said that - looking at your frame and crop it is 100% better. I might have to go back to the RAW and get one up on the wall like that as suggested
Thanks for the comments. Just goes to show how much more I have to learn.... I'll keep plugging away.
Results 21 to 40 of 280
-
8th September 2011, 10:36 PM #21
Re: "School of Portraiture" - Lesson 08 - Taking it to the next level ("The Reunion")
-
8th September 2011, 11:07 PM #22

- Join Date
- Mar 2011
- Location
- California
- Posts
- 39
- Real Name
- Peter
Re: "School of Portraiture" - Lesson 08 - Taking it to the next level ("The Reunion")
-
9th September 2011, 12:55 AM #23

- Join Date
- Dec 2008
- Location
- New Zealand
- Posts
- 17,660
- Real Name
- Have a guess :)
Re: "School of Portraiture" - Lesson 08 - Taking it to the next level ("The Reunion")
Hi Peter,
We might have to address the sharpening seperately (I'm hoping that someone who knows more about sharpening in lightroom will chip in), but in terms of the rest of the shot ...
- Personally, I think I'd crop it more agressively -- generally I look very closely at the amount of image above the eye line, and in many cases, it's a bit like excess sky in a wide-angle landscape shot in that often if can be cropped off with no ill effects.
- In terms of tones, as I mentioned before, the tones around the young lady's left cheek (to camera right) are a bit too hot, and thus have lost some of the detail (just compare it to the first shot which was spot-on, to see what I mean).
- Often with shots like this - where the head is being held at an angle - I compose the shot so that the long axis of the frame is parallel to the falling hair (as you've done here), leaving a nice diagonal through the centre of the face (lop a bit off the top, and I think you'll see this even more.
- In shots like this I usually grab a few frames with the hair on her right clipped back (I usually threaten them with duct tape ) - as it stands, I think it tends to break the normal flow of the eye through the image a bit.
- The young lady has quite a "gummy" smile - sometimes in these situations you can get a nicer shot with a no-teeth showing smile, or one 1/2 way inbetween. Often the start of a smile is a good one to catch. No right or wrong here, just options to consciously throw into the mix when you're shooting.
Also, in this type of shot (in fact in many shots) I often put a vignette around the image to draw the eye more towards the centre (just be sure to re-adjust levels afterwards).

-
9th September 2011, 01:05 AM #24

- Join Date
- Dec 2008
- Location
- New Zealand
- Posts
- 17,660
- Real Name
- Have a guess :)
Re: "School of Portraiture" - Lesson 08 - Taking it to the next level ("The Reunion")
Hi Paul,
At a guess, I'd say you're a graduate of the Scott Kelby school of portrait retouching?
In all honestly, I don't think that there's a lot I can add to this, but for what it's worth ...
- I think the composition is great
- Would be nice to see it at a higher resolution (don't be afraid to post images up to around 1500 x 1000; at least 900 x 600 in any case)
- Possibly a wee bit too much skin softening for my taste
- Personally, I don't like her left (but camera right) forearm looking that far out of focus - not sure if it's a DoF issue, or you've blurred it. If you're trying to de-emphasise it, I'd be inclined to do it via levels rather than via softening.
Great work, keep it up
-
9th September 2011, 10:56 AM #25

- Join Date
- Dec 2008
- Location
- New Zealand
- Posts
- 17,660
- Real Name
- Have a guess :)
Re: "School of Portraiture" - Lesson 08 - Taking it to the next level ("The Reunion")
Hi Andrew,
I think that it's a great shot, but the first thing that struck me was the skin tones - very much looks like there's a green cast over the image - so the first thing I'd suggest is "get a grey card" - it'll make a HUGE difference to the quality of images like this.
Other than that, probably just some good sharpening is required, along with some minor levels tweaks ...
What do you think of this by comparison?

-
9th September 2011, 11:27 AM #26

- Join Date
- Sep 2011
- Location
- Battle East Sussex
- Posts
- 88
- Real Name
- Paul
Re: "School of Portraiture" - Lesson 08 - Taking it to the next level ("The Reunion")
-
9th September 2011, 08:47 PM #27

- Join Date
- Dec 2008
- Location
- New Zealand
- Posts
- 17,660
- Real Name
- Have a guess :)
Re: "School of Portraiture" - Lesson 08 - Taking it to the next level ("The Reunion")
Hi Paul,
Have a read about Scott here.
-
10th September 2011, 02:43 PM #28
Re: "School of Portraiture" - Lesson 08 - Taking it to the next level ("The Reunion")
Colin - is there any chance you could expand a bit on the PP you did with my image?
I took your advice and ordered a canvas (had a couple left over from a previous deal) but I couldn't get my picture to have the same pop like yours - particularly the eyes.
Appreciate some more advice.
Thanks
-
10th September 2011, 05:14 PM #29
Re: "School of Portraiture" - Lesson 08 - Taking it to the next level ("The Reunion")
Hey Colin, funny you should mention the 'grey card', I actually used a grey card and a colour checker passport for all of my shots, but this was a very bad mistake by me - I actually upped the green cast in LR3 to pull some colour out of the background - I didn't think you could notice it that much, but after seeing yours, it became quite apparent; good eye! Thanks.
-
10th September 2011, 07:50 PM #30

- Join Date
- Dec 2008
- Location
- New Zealand
- Posts
- 17,660
- Real Name
- Have a guess :)
Re: "School of Portraiture" - Lesson 08 - Taking it to the next level ("The Reunion")
Hi Peter,
Sorry that it's taken me a little while to work down the posts to this one.
To be honest, I'm not sure what to say about it as a whole; obviously you've combined a lovely interaction between the two kids with the setting sun (ie a portrait with a sunset landscape), but I'm really not too sure just how well they go together, as my keeps on getting drawn to the sun (being pure white), rather than it being drawn to the faces. It's a great technologocal achievement, but I just don't know if it works asthetically. As an alternative, it would be interesting to see a similar shot taken just after sunset when there was still lots of colour in the sky, and perhaps a wider field of view on the background.
As a "Canvas on the Wall", do you think this might look better?

-
10th September 2011, 08:04 PM #31

- Join Date
- Dec 2008
- Location
- New Zealand
- Posts
- 17,660
- Real Name
- Have a guess :)
Re: "School of Portraiture" - Lesson 08 - Taking it to the next level ("The Reunion")
Hi Peter,
Heck, I don't know - that was a couple of days ago
I just had a quick play with it again, and have attached a screen shot of my ACR settings for the basic panel. The highlight down the left cheek is always going to be a compromise - if I tone it down too much it affects the rest of the image too much (like it did in my first attempt), so I've left it a bit higher for the sake of the rest of the image here. I haven't touched the eyes, but would do if this was for a canvas print.
If you'd like me to retouch the original file and send it back so you can get it printed, just send it to me (I'll give it "the whole nine yards" as they say).

-
10th September 2011, 08:11 PM #32

- Join Date
- Dec 2008
- Location
- New Zealand
- Posts
- 17,660
- Real Name
- Have a guess :)
Re: "School of Portraiture" - Lesson 08 - Taking it to the next level ("The Reunion")
Hi Andrew,
Yeah - Skin tones are what we call a "memory colour" (the brain knows how they should look), whereas we can get away with more variation with other colours like greenery.
If you want to cheat though, just put a select around the couple (with a small feather) - invert it - and then add a HSB layer and play with the saturation. Because the eye isn't good at spotting differences in saturation around boundries, you don't need to be too precise.
EG (REALLY quick and dirty example)

Last edited by Colin Southern; 10th September 2011 at 08:21 PM.
-
10th September 2011, 11:33 PM #33
Re: "School of Portraiture" - Lesson 08 - Taking it to the next level ("The Reunion")
Colin - thanks for the offer but I'm really keen to go through the learning myself.
The one I was interested in is the second picture (vertical crop). When you published the photo above, her closest eye is crisp sharp and bright. Is this just via sharpening or is there some other magical process going on that I don't know about?
Thanks.
-
11th September 2011, 12:44 AM #34

- Join Date
- Dec 2008
- Location
- New Zealand
- Posts
- 17,660
- Real Name
- Have a guess :)
Re: "School of Portraiture" - Lesson 08 - Taking it to the next level ("The Reunion")
Hi Peter,
Ah - I'm with you. Off memory, I think I may have sharpened it a little. The "proper" was to do it is to create a selection, but the "quick and dirty" way is to just just the sharpening tool (not USM) - if you leave it set to the default of 50 and wipe it about 3 times over the full res image - it's usually about right. For a canvas print I usually spend a lot of time on the eyes though - cleaning up any veins - improving the whiteness - increasing iris colour and sharpening - tweaking catchlights etc.
-
11th September 2011, 01:57 AM #35
Re: "School of Portraiture" - Lesson 08 - Taking it to the next level ("The Reunion")
@ Colin: Would it be OK if I came to Nelson, NZ for a week or two and studied a while under you??? I'd be willing to buy the beer and wine!! - That was an amazing 'quick & dirty example'!! That's what I want to be able to do!!! Thank you!
-
11th September 2011, 03:38 AM #36

- Join Date
- Dec 2008
- Location
- New Zealand
- Posts
- 17,660
- Real Name
- Have a guess :)
Re: "School of Portraiture" - Lesson 08 - Taking it to the next level ("The Reunion")
Hi Andrew,
Unfortunately, I'd not a wine and/or beer drinker - but flat budget diet lemonade would seal the deal!
Honestly, that was just a quick and dirty example (hard to do much else on a low-res image) - but if you want to replicate it ...
- Select magnetic lasso tool
- Select the background
- Save the selection
- Select the alpha channel & paint over the edge of the mask (only needed because the magnetic lasso does a poor job around the periphery of the image)
- Make selection (ctrl + click on alpha channel thumbnail)
- Get back to layers (switch off alpha channel or the people will be blue while you do it)
- Add HSB Layer
- Tick "Colourise" - Hue to 38 - Sat to taste (about 25%)
Job done
-
11th September 2011, 03:54 AM #37
Re: "School of Portraiture" - Lesson 08 - Taking it to the next level ("The Reunion")
I said I would be back...
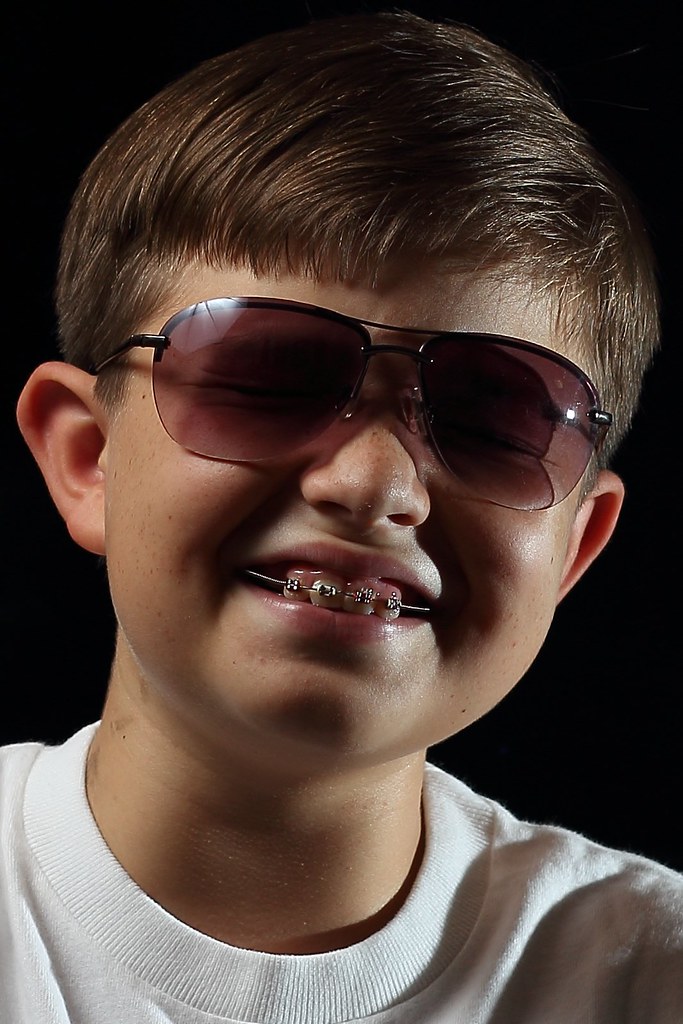
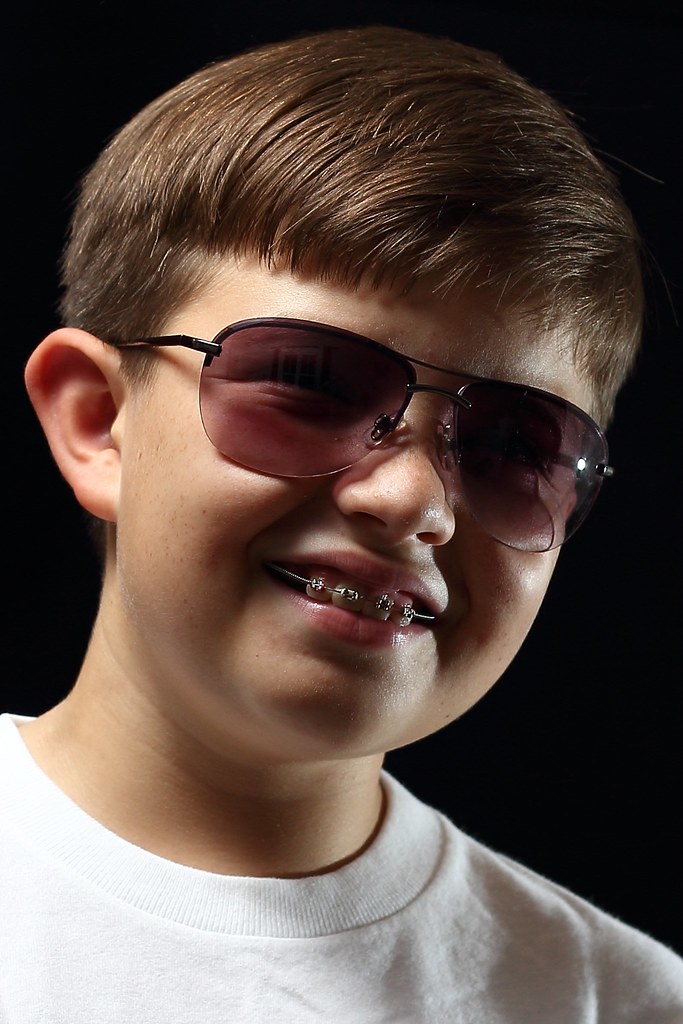
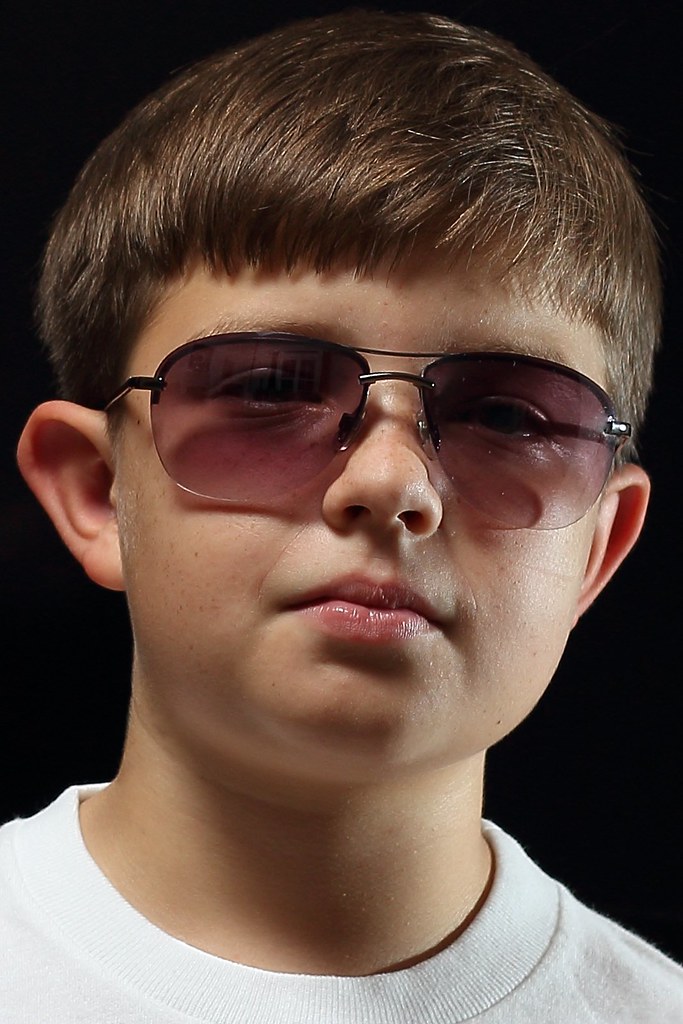
I did get a model this time.... my son sat in. This was one our first attempts at 'no specular highlights'.

OK, so not a success! I said son, you are supposed to be like the TERMINATOR?! OK!? OK he said...

OK, still not a success. THe lighting still not right. Son, THE TERMINATOR!!??!?!?!?

I know you can still see a window reflection in the sun glasses....
-
11th September 2011, 04:10 AM #38
Re: "School of Portraiture" - Lesson 08 - Taking it to the next level ("The Reunion")
Brian; I hope you don't mind me saying - shot #1 looks exactly like you, possibly several years ago - that's a definite image of your son!! Wow!!
-
11th September 2011, 04:13 AM #39
Re: "School of Portraiture" - Lesson 08 - Taking it to the next level ("The Reunion")
Andrew, did you mean to say too much harsh light to subject left? I agree.
-
11th September 2011, 08:22 AM #40

- Join Date
- Dec 2008
- Location
- New Zealand
- Posts
- 17,660
- Real Name
- Have a guess :)

 Helpful Posts:
 Reply With Quote


