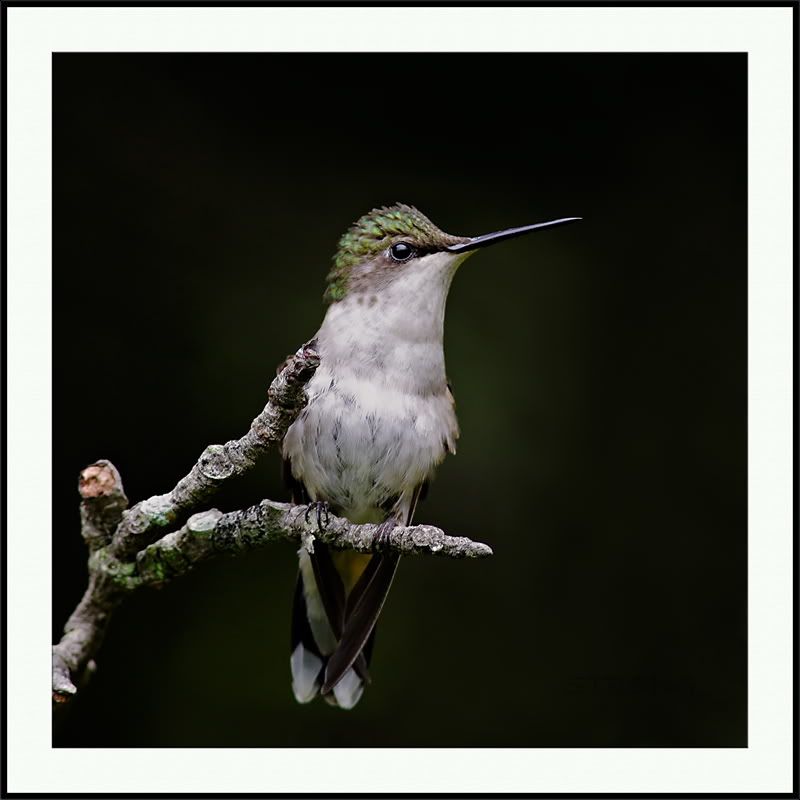
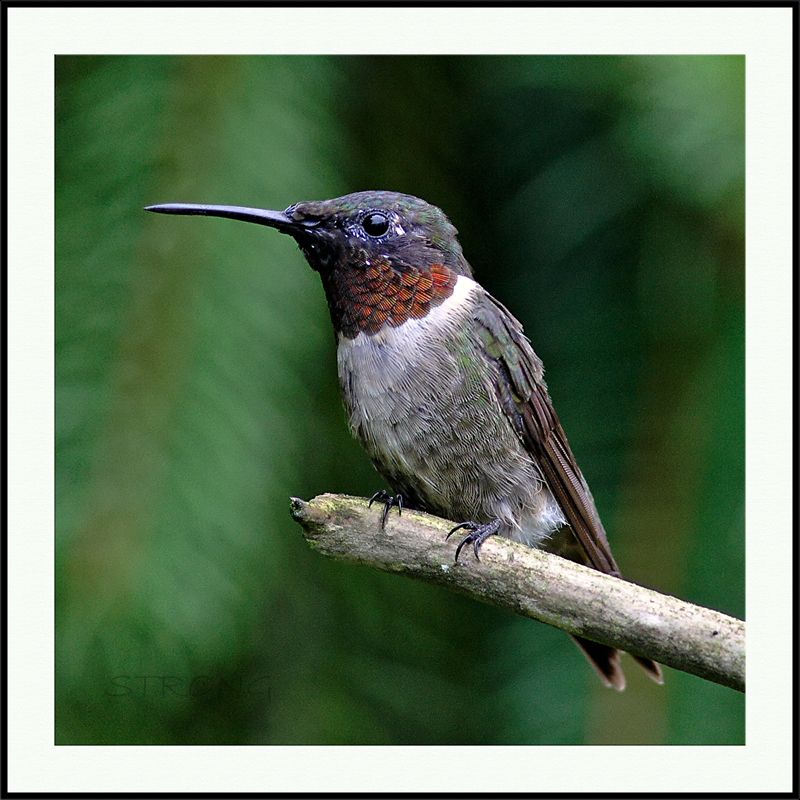
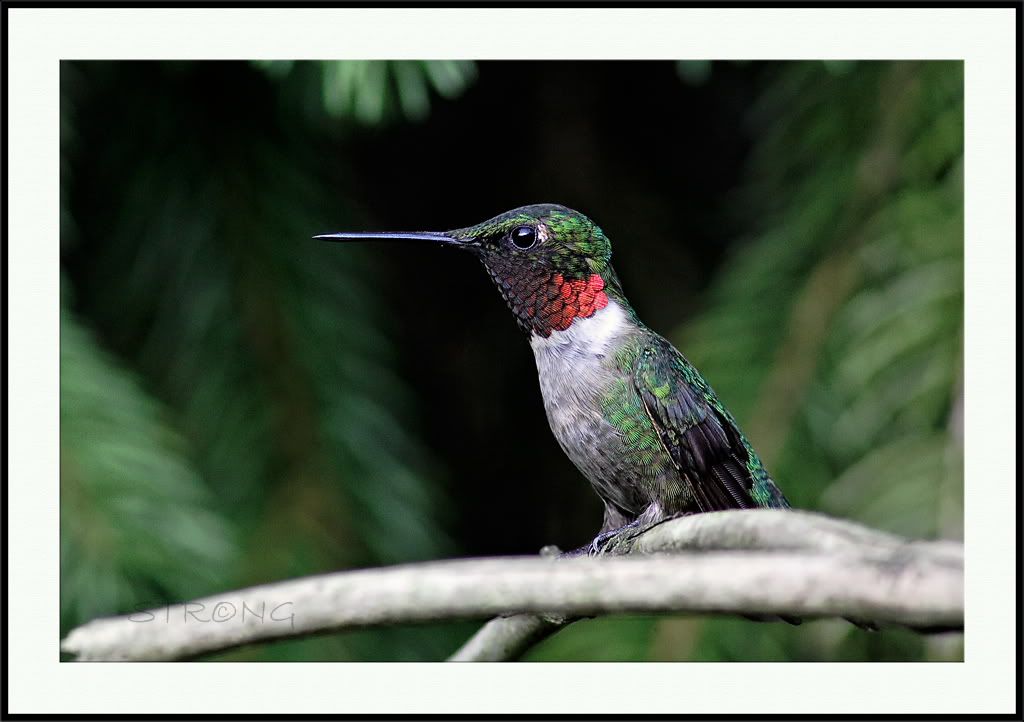
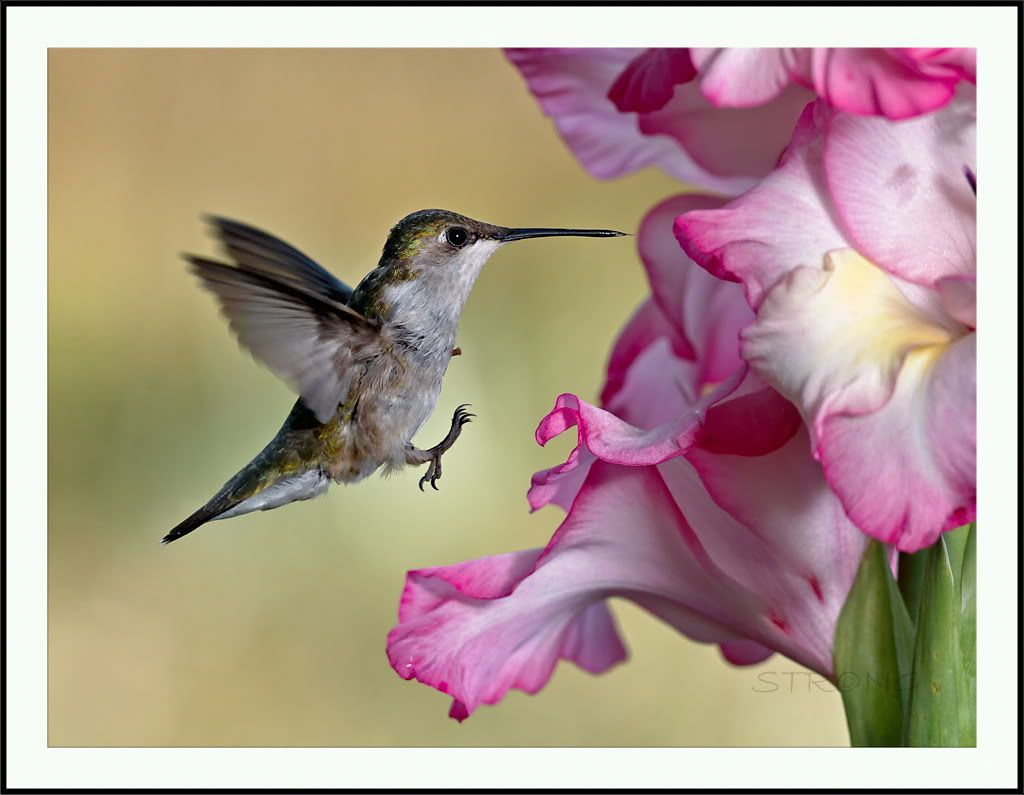
There has been a few people asking about how to photograph hummingbirds, so here is a little info on how i shoot them. Mods can move this to the appropriate place.
Hummingbirds are very inquisitive little birds. The more time you spend around them, the closer you can get to them without spooking them. Just sitting near your feeders for awhile in the morning or evening will help alot. I can stand next to my feeders, and they will fly within 2 feet or less of me. The feeders i use are small single port feeders. (only hold about 3 OZ. of fluid. This keeps the nectar fresher , keeps them coming more often, and alows you to position the direction of the feeding port to get the bird facing the direction you want it to.
Where do i position my feeders?............. I like a well lit shaded area, with a crossing light. I try to keep my light behind me and to one side or the other. If its in the morning or evening, it can be in direct soft sunlight with the same light direction.
In late morning light around 8:30 to 10:00, i position my feeder under the shade of a bush, with the light coming from the side. The background is sun lit. This gives a milder backlit situation and alows you to use some fill flash to expose for your subject. You can get really good shutter speeds this way. I set my flash 2 feet from the feeder (on a tripod) and use a flash bounce card to soften the light.
Getting close is absolutely essential if you want good shots. They are tiny birds and you need to fill the frame to keep from cropping away all your resolution. I'm shooting with a canon 300 f/4L IS lens (sometimes with a TC) from 6 feet or less.(sometimes as close as 4 feet). The closer the better, as long as you have just a touch of extra room to make a minimal crop for composition.
Light is very important in any shot. For hummingbirds, you need very good light to get high shutter speeds, but not direct hard sunlight that will blow out detail on the reflective feathers. I find very bright cloudy days ideal for hummingbirds. Other than that, i like morning light, better than the evening. If your shooting in the afternoon, find a well lit area in the shade and use some fill flash if needed.
Exposure is also important. Push your exposures to the limit. (expose to the right). Most of the information your camera records, is in the right side of the histogram. The more information you record, the better your shots will be. So shoot in RAW, expose to the right, and bring your exposure back in post processing. If you underexpose, you will have more noise and less information recorded.
The 2 cameras i use are a canon 40D and a canon 1d mk II. The Lens is a Canon 300 f/4L IS, 1.4X TC and 2X TC.
In the menu of my camera, i can go to 'focus search' and disable it. This will keep your camera from searching for a focus if you miss your target. If you try and focus and can't get the dot just right, the camera will usually try and find something to focus on and cycle through the full focus range of the lens. By that time, your subject is long gone and you missed your shot. If you turn the focus search off, the camera will not search and give you enough time to get the dot on the subject and hit the shutter button again and get a focus lock. What you will have to do, is get your focus 'close' manually, and then the auto focus will take over from there. It takes a little getting used to , but helps alot.
My camera setting ................
ISO is uaually 1250. Anything more than that is a little too noisy for my taste. (at least with the equipment i have) A newer camera model can push the iso further with better results. So , push your iso as far as you can to get shutter speeds of 1/1250 or more if you can. Speeds of 1/2000 are needed to freeze the wings. I also incorporate some noise reduction in my post processing, because of the high iso's.
Focus drive..........AI Servo for flying shots and one shot for still shots. Use your focus dots to compose your shots. This will alow you to get in closer and compose the shot in camera.
Metering mode......... I usually use spot metering for most things, but for hummingbirds , i use evaluative metering. Hummingbirds are too small and fast to get the center dot on, to meter off them. Just remember if you have a bright background, your camera might be fooled into underexposing for the hummingbird. So check your histograms and use exposure compensation when needed.
Shooting Mode.........Manual. Too hard to hit the exposure lock on quick subjects. Adjust your exposure manually and keep reviewing your histograms ,making fine adjustments as needed, when light changes.
Use your focus dots to compose your image in camera. Learn how to adjust them without looking at the camera. This will alow you to get in tighter and fill the frame.
WB......Auto I shoot in RAW , so i adjust the WB in post.
Aperature..........I adjust as needed and according to the lighting conditions. Usually between f/6.3 and f/9.
Pay attention to your shooting conditions. Early morning and late evening , when shutter speeds are low, are ideal for still shots. I like to watch my feeders from a distance, and see what limbs the hummingbirds like to perch on, and then set up and wait for that shot. If the limb they use isn't ideal for a photo, I often will take a bare branch and wire tie it in a good location for them to use. They like a bare branch in a shaded area, near the feeder , so they can watch over it. Postion the branch in the right location, and they will start using it for their perch, giving you the perfect shot your after. After you find a location they like, you can change the branch , from time to time, for different shots.
Be creative...............you can hide the feeder with flower clippings. When the hummingbirds come to feed from the feeder, it looks as if they are feeding from real flowers. This will allow you to "set up" the perfect shot with a great background.
Results 1 to 17 of 17
Thread: How I Photograph Hummingbirds
-
1st August 2012, 06:35 AM #1

- Join Date
- Aug 2009
- Posts
- 2,342
- Real Name
- Steve
How I Photograph Hummingbirds
Last edited by Steve S; 1st August 2012 at 06:43 AM.
-
1st August 2012, 07:24 AM #2

- Join Date
- Apr 2011
- Location
- Ontario (mostly)
- Posts
- 6,667
- Real Name
- Bobo
re: How I Photograph Hummingbirds
Thanks for the great tutorial. Copied and stashed for future reference - I do not have a backyard so for now I just have to enjoy what you are producing.
-
1st August 2012, 08:27 AM #3
re: How I Photograph Hummingbirds
Steve, Thank you for effort you have put in to explaining the procedures you use to achieve your stunning shots. Very much appreciated.
-
1st August 2012, 08:48 AM #4Moderator


- Join Date
- Feb 2009
- Location
- Glenfarg, Scotland
- Posts
- 21,402
- Real Name
- Just add 'MacKenzie'
re: How I Photograph Hummingbirds
That is an excellent contribution to the body of knowledge that is shared here on CiC, particularly as it comes from someone who has truly mastered the art and craft of photographing these little creatures.
You will see below that I have already added a tag to it. I will also be saving it in hidden wee bit of the site where we store valuable things .... to be pulled out whenever it seems appropriate. So the next time the question is asked, we can provide a quick link back to this thread.
Thanks Steve, That is a great contribution.Last edited by Donald; 1st August 2012 at 09:08 AM.
-
1st August 2012, 10:05 AM #5
re: How I Photograph Hummingbirds
Thanks Steve, I have always been fascinated by how you get such wonderful shots of these beatiful little birds.
I like the way that your tutorial not only explains the technical aspects of your set-up but also the more practical considerations of getting the birds into the right position for you. A really nice tutorial. I just wish I lived in a place where I had the opportunity to photograph them!
-
1st August 2012, 10:06 AM #6
re: How I Photograph Hummingbirds
Steve,
Thanks so much for this tutorial. I've just purchased a feeder, and now I have some guidance about where and how to set it up. I'll come back to this post when I'm ready to start trying to get some shots.
Thanks!
-
1st August 2012, 11:07 AM #7
re: How I Photograph Hummingbirds
Steve,
This is exactly what I was looking for! Thanks!
Do you do much in terms of PP on your hummingbird shots? You mention it briefly, but I was wondering if you had more in-depth instructions... (no rush, you can let you fingers rest after typing all of the other stuff up... I have plenty to try before I get to PP).
Thanks again!
- Bill
-
1st August 2012, 12:30 PM #8
re: How I Photograph Hummingbirds
An excellent tutorial filled with specific settings, tips and images of the results obtained using the methods suggested. A solid keeper! Thanks for taking the time and effort to help us understand your techniques Steve!

-
1st August 2012, 12:42 PM #9

- Join Date
- Jan 2012
- Location
- Mid Atlantic coast, USA
- Posts
- 541
- Real Name
- Natalie
re: How I Photograph Hummingbirds
Your shots are amazing. Thank you for the tutorial, it's wonderful. I find that if you can put a pole in front of the feeder and tape a vase of flowers to it, they will investigate the flowers, before going for the feeder, and you can get some wildflowers or whatever in your shots.
-
1st August 2012, 03:02 PM #10

- Join Date
- Jul 2012
- Location
- Montréal, Québec
- Posts
- 147
- Real Name
- Brad
re: How I Photograph Hummingbirds
Adding to the thanks and kudos, but also specifically to say that I appreciate your reinforcement of the "expose to the right" principle. This is something that many traditional photographers (coming from film) find counterintuitive (or they misunderstand and think they are being told to overexpose to the point of clipping). But it works exactly as you describe. There's an instructive essay about it on the Luminous Landscape site at http://www.luminous-landscape.com/tu...se-right.shtml.
-
31st May 2013, 06:43 PM #11
re: How I Photograph Hummingbirds
Thank you for sharing Steve. This is the first time I've never seen this link and your hummingbirds photos which are truly stunning, the beauty of nature, perfected.
-
1st June 2013, 12:53 AM #12

- Join Date
- Aug 2009
- Posts
- 2,342
- Real Name
- Steve
-
1st June 2013, 02:14 AM #13
Re: How I Photograph Hummingbirds
Perfect timing on Christina digging this up. I have been spending a lot of time, more than usual, at my parents house due to my Dads poor health and I have been thinking of their hummingbird feeder outside their picture window. Wondering how I could get a shot of these wonderful little (and fast) creatures. I have been sitting out on the patio about 10 feet from the feeder every evening and they have seemed to have gotten used to me and pay very little, if any, attention to me. I think this weekend I will have the camera with me to start experimenting. Thank you so much for the advice that you gave. Hopefully I will have something to share come next week.
Cheers
-
1st June 2013, 01:02 PM #14
Re: How I Photograph Hummingbirds
Thanks, Christina, for bringing this thread forward. It is most timely as the hummingbirds have returned to my feeder just last week. Capturing a good photo of one these little creatures is definitely on my "to do" list. Yesterday, I saw a sand hill crane and a hummingbird within a few moments of each other. It was a quite a contrast and hard to believe they are both in the bird family.
-
1st June 2013, 01:16 PM #15
Re: How I Photograph Hummingbirds
Hi Steve,
Yes, I'm pretty good with a shovel, but the fact of the matter is that Donald handed me the shovel in another thread. Given all the folks trying to learn to photograph birds I thought I would bring this one up for the benefit of all.
I have yet to capture a shot of a hummingbird, so I was delighted to find this thread.
-
5th August 2013, 01:53 AM #16
Re: How I Photograph Hummingbirds
Thanks Steve and Christina for the great how-to article. Our hummers are quite active now at our kitchen feeder. I'll try out some of these tips.
Paul S
-
12th August 2013, 05:56 PM #17

- Join Date
- Feb 2013
- Location
- Vermont, USA, Southwestern corner
- Posts
- 105
- Real Name
- Susan
Re: How I Photograph Hummingbirds
Steve, Thank you for providing a link to your tutorial. I have read it, and feel it will be a great help to me.
The one time I snapped a photo, the little guy flew away. Hope they will get used to the sound of the shutter! I need to sit out on the porch more so they get used to me, because any movement can make them disappear. Sounds like you have yours acclimated so well that you can almost do anything (within limits, of course!).
I will let you know how much better success I have. Thanks again.
Susan

 Helpful Posts:


 Reply With Quote

