 Helpful Posts: 0
Results 1 to 14 of 14
Thread: Cedar Waxwing and a robin
-
2nd June 2010, 06:36 PM #1

- Join Date
- Aug 2009
- Posts
- 2,342
- Real Name
- Steve
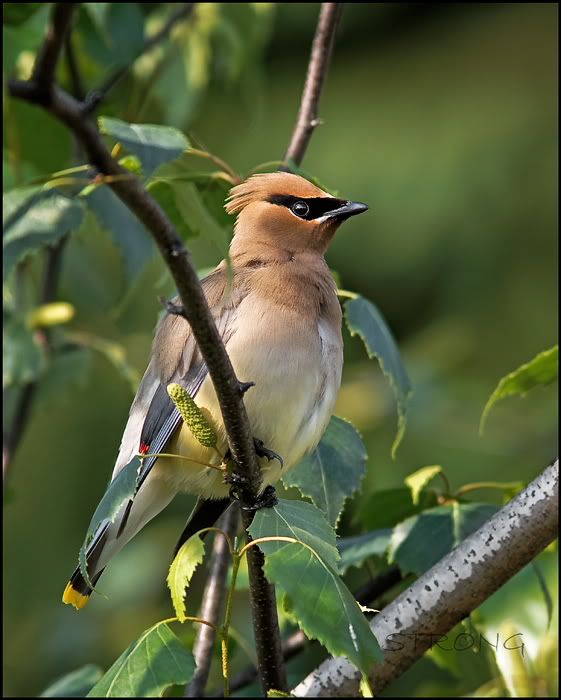
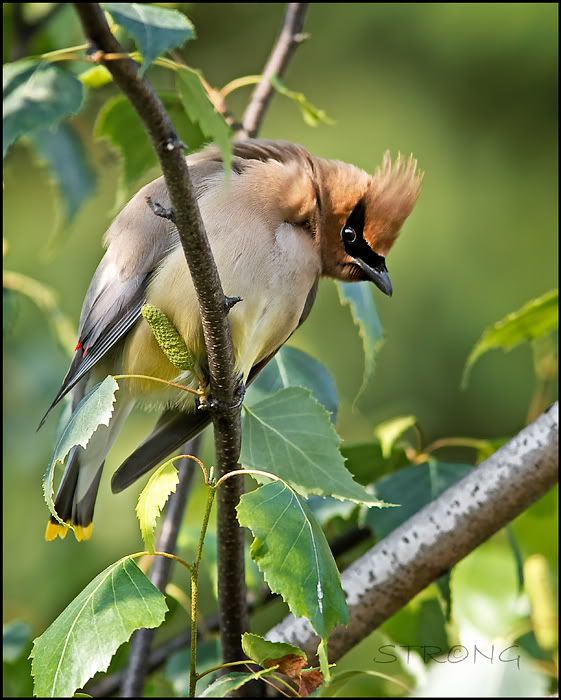
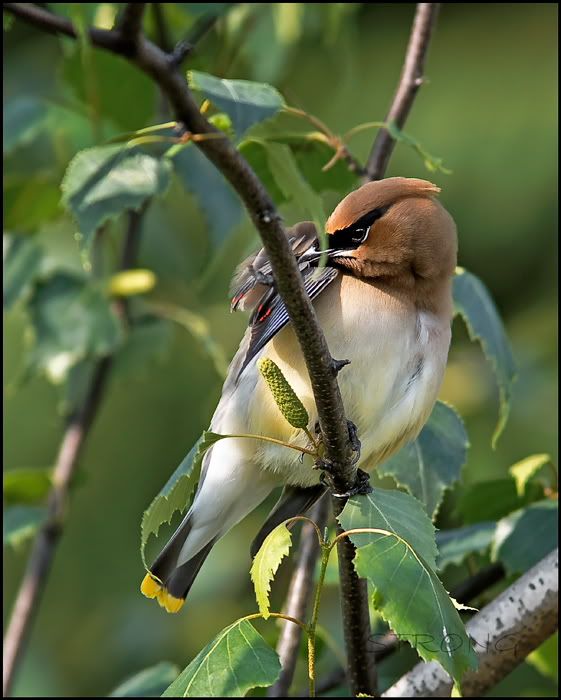
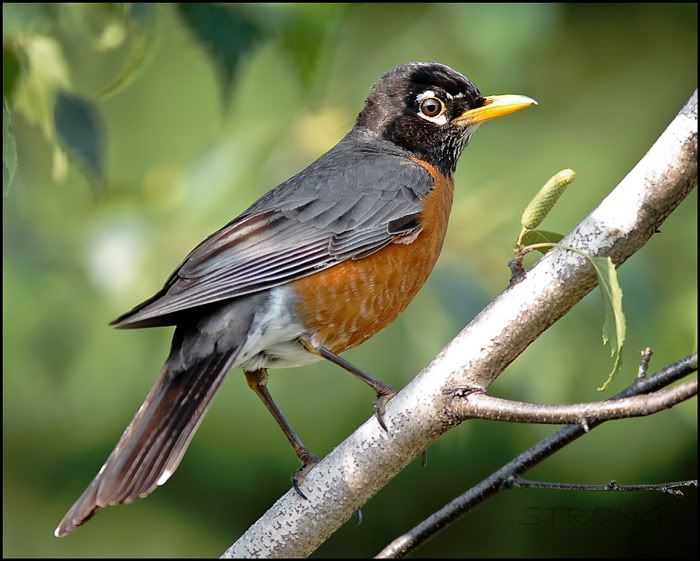
Cedar Waxwing and a robin
-
2nd June 2010, 07:27 PM #2
Re: Cedar Waxwing and a robin
Steve,
Beautiful shots!
-
3rd June 2010, 02:24 AM #3

- Join Date
- Oct 2009
- Location
- Maryland, USA
- Posts
- 1,015
- Real Name
- Rick
Re: Cedar Waxwing and a robin
Wonderful shots, Steve. I really love the detail on the robin: especially the eyes. They look half-closed. That isn't the nictitating membrane, is it? I seem to recall that that moves sideways, not up and down.
Cheers,
Rick
-
3rd June 2010, 03:35 AM #4

- Join Date
- Aug 2009
- Posts
- 2,342
- Real Name
- Steve
Re: Cedar Waxwing and a robin
Thanks Rick, i think that is just a catchlight.
-
3rd June 2010, 03:35 AM #5

- Join Date
- Aug 2009
- Posts
- 2,342
- Real Name
- Steve
Re: Cedar Waxwing and a robin
Thanks Jim, glad you liked them
-
3rd June 2010, 05:59 AM #6
-
3rd June 2010, 06:06 AM #7
Re: Cedar Waxwing and a robin
Great shots Steve,
So tell me, what is your secret for reducing the contrast ratio?
Some birds parts look sunlit, but the shadows are nowhere near as deep as I get.
Fill flash (what sort)?
Big reflector below?
Darn good PP?
I have to know to compete with this quality
Thanks,
-
3rd June 2010, 08:36 AM #8

- Join Date
- Jan 2009
- Location
- Sydney, Australia
- Posts
- 362
Re: Cedar Waxwing and a robin
Steve,
This series shots are really nice. The last one is very standing out. Just one question: Did you do 'eye-sharpening" in Photoshop?
Regards,
Yan
-
3rd June 2010, 11:09 AM #9

- Join Date
- Aug 2009
- Posts
- 2,342
- Real Name
- Steve
-
3rd June 2010, 11:13 AM #10
Re: Cedar Waxwing and a robin
Love the clarity and detail.
-
3rd June 2010, 11:49 AM #11

- Join Date
- Aug 2009
- Posts
- 2,342
- Real Name
- Steve
Re: Cedar Waxwing and a robin
Thanks dave. Just good PP i guess. The originals don't look too much different than the edit.
I'm editing with a combination of DXO---Lightroom---Photoshop. In dxo, i reduce the contrast with a reverse S curve to brighten the shadows and darken the highlights. Then i bring the contrast back with the gamma sliders / contrast sliders/clipping the blacks a little. In lightroom i adjust a little more with the fill light and recovery sliders and get some more contrast with the clarity slider.
I also get more contrast with 3 layers of USM. First layer is in dxo--amount .40--radius 5---threshold 4. The second is in lightroom with a raduis of 3 and amount .36 and the third is in photoshop with an amount of around .30 to .50 and a radius of 6 to 50, it just depends on what looks best. As you slowly increase the radius, you will see a point where the detail starts to get worse and that is the radius i choose, then adjust the amount that looks the best for that radius.
After all that, if i feel the background is too bright, i add a vignette to make the subject slightly brighter than the background. To make the vignette, i dup the layer and circle the subject with the lasso tool. Click on quickmask---invert---gaussian blur set to about 150---click off quickmask---add layermask reveal selection---set blending mode to multiply---set opacity to a range of 20-50/whatever looks best. At low opacities, this type of vignette is very subtle but a very powerful effect on your images.
I don't know if that was the answer you were looking for.
-
3rd June 2010, 11:58 AM #12

- Join Date
- Aug 2009
- Posts
- 2,342
- Real Name
- Steve
-
3rd June 2010, 11:59 AM #13

- Join Date
- Aug 2009
- Posts
- 2,342
- Real Name
- Steve
-
3rd June 2010, 12:02 PM #14
Re: Cedar Waxwing and a robin
Hi Steve,
Way more than I was expecting and a hugely different workflow to mine, but it certainly answers my own, and Yan's, questions.
It reads like you're doing and undoing the same things (contrast mainly), but obviously the success is in the detail - which you have very helpfully provided, so I might experiment along those lines. Particularly for birds, well their feathers; I'm not sure I'm doing as well as I could, they seem to need a different sharpening technique to most other things in life.
Many thanks,


 Reply With Quote
