I shot some accessory photos to use on my blog. This is my first attempt at "product photography"
As a number of you have experience with commercial photography and studio lighting, I'd like your comment and critique on these. Please advise on your overall thoughts, what you like or don't like (and specifically why), what you think could be improved (and how), and so forth. Any tips / tricks on this type of photography and lighting would be appreciated.
Thank you for your time and assistance.
Quick description of the setup:
The surface is a black tile purchased at a home improvement store
There were two lights. One speedlite flash for key light to the right front shot through a white umbrella. One supplementary speedlite flash to the right shooting toward the left over the items.
A white reflector was on the left to bounce soft light back onto the items. Another white reflector was placed at the rear of the tile to reflect light over the tile surface to add a glare look.
All item images were focus stacked from a number of shots, to create a sharper result with more DOF and impact, while still keeping the foreground and background blurred a bit.
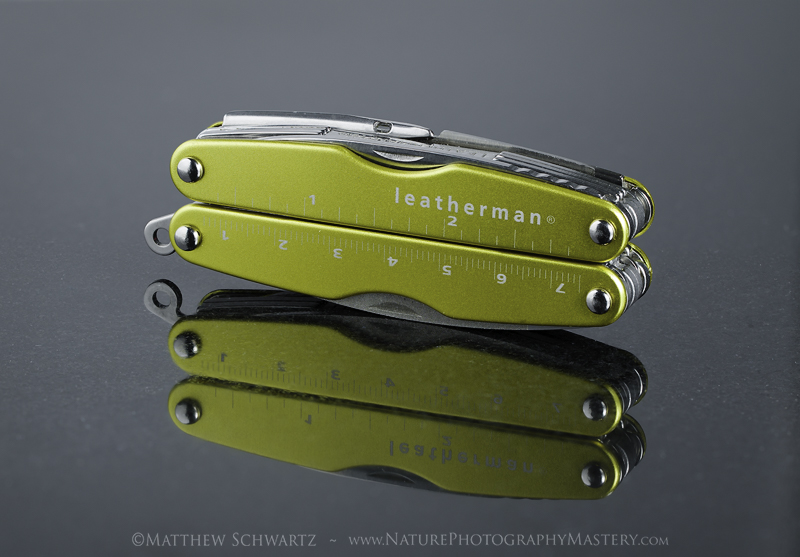
Leatherman multi-tool
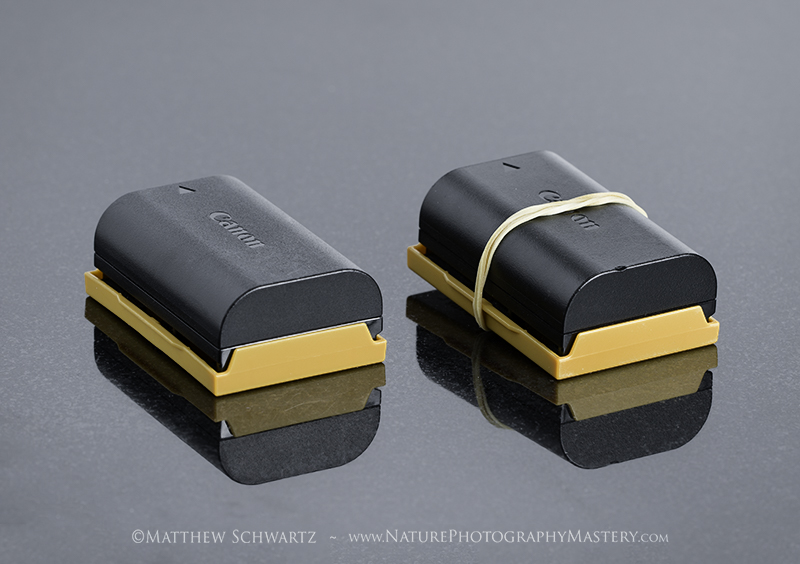
Canon batteries. The rubberband indicates a fully charged battery, the non-banded is used. (I do this while on nature photography shoots so I can quickly see which are ready to be swapped in to the camera)
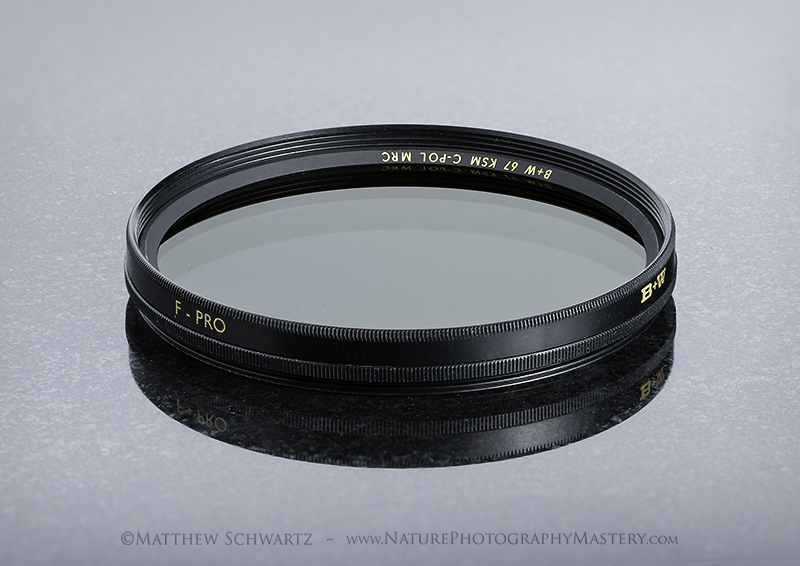
B+W Polarizing filter
Results 1 to 14 of 14
-
6th February 2017, 08:33 AM #1
First attempt at product photos - C&C Request
-
6th February 2017, 12:47 PM #2
Re: First attempt at product photos - C&C Request
The appearance of the surface of the tile is correct on the first two but not sufficiently clean on the last. Otherwise the lighting and the stacking seem really correct especially for a first attempt

-
6th February 2017, 12:59 PM #3
Re: First attempt at product photos - C&C Request
They have now appeared on the site.....thanks.
The mottled effect of the black tile detracts as noted above. Getting suitable black reflective surfaces is key to this type of photography. Albeit may be a bit more expensive than the tile you procured for these shots.
A well cleaned sheet of black rigid acrylic material is often used to gain evenness and avoid the distracting mottled effect.
-
6th February 2017, 01:19 PM #4
Re: First attempt at product photos - C&C Request
They are good; i like #1 more because there is more to see

-
6th February 2017, 01:47 PM #5

- Join Date
- May 2012
- Location
- northern Virginia suburb of Washington, DC
- Posts
- 19,064
Re: First attempt at product photos - C&C Request
These are really nice photos for a first attempt at the genre, so much so that it's clear that you've really got a knack for this stuff. The most important characteristic in all three of them is that you very nicely displayed the color and shape. The third subject has texture and you made it very appealing.
I immediately noticed the distracting mottled look in the tabletop in all three images. Opaque, glossy, black acrylic is ideal for this type of photo. Perhaps this site will be helpful for purchasing it. If you do buy a piece, just be aware that it scratches unbelievably easily.
There is something going on in the first photo that I don't remember seeing before. I can't explain the cause so I also can't provide a solution. Notice that the numbers on the tool are more visible on the right side of the tool but are more visible on the left side of the reflection. Regardless, it would be ideal for me if the numbers were easily visible throughout the length of the tool and its reflection. Consider displaying only part of the reflection for a composition that would be more dynamic (less static) for me.
Depending on the presentation in your blog, you might want to light the tabletop so it is the same color in all three versions.
It's admirable that you chose to use focus stacking, but I wouldn't have gone to that trouble if I had made the images only for display on the Internet when a relatively small file can be just as effective as a large file. I would have used a focal length, aperture and distance between subject and camera that kept everything in focus and I would have then cropped to fill the frame with the subject. Doing that won't allow for a really large print but it will work fine in a blog.
On a technical note, I disagree that your reflector at the rear added a "glare look." For me, the color of your white reflector is simply being reflected in the tabletop for a very nice effect that presumably brightens that area of the scene than if you had not used it. Glare by definition is the mirror-like reflection of a direct light source.
Did you use a color checker or similar device to verify that the colors of your subjects are accurate? Do you care if they are accurate (you understandably might not)?
Congratulations again on a wonderful start!Last edited by Mike Buckley; 6th February 2017 at 03:31 PM.
-
6th February 2017, 04:25 PM #6

- Join Date
- Jul 2016
- Location
- Ireland
- Posts
- 2,195
- Real Name
- Maurice
Re: First attempt at product photos - C&C Request
First attempt, it won't be long before you reach your goal.
-
6th February 2017, 06:05 PM #7
Re: First attempt at product photos - C&C Request
"I LEARN SOMETHING EVERY DAY
 "
"
I like your idea of using a rubber band to differentiate between freshly charged and used camera batteries. I will be using that technique from now on...
I also keep my rechargeable AA batteries for my flash units in plastic cases that hold four batteries.

The rubber band technique would also help in identifying freshly charged batteries...
-
6th February 2017, 08:22 PM #8
Re: First attempt at product photos - C&C Request
Great start Matthew,
I have to agree with Mike regarding the 'distraction factor' of the mottling below the glaze of the tile though.
The filter is the most impressive for me.
Well done, Dave
In those boxes Richard, I adopt the principle that when removed from charger, all four are 'the same way round', but when removed from a flash, they alternate - so as long as I remember to transfer them in to the case as they are, I know their state (esp. as my cases are just lik yours; see-through). I guess a band makes it more obvious though and is a good idea for the camera batteries - I put my spent one back in a different place (in camera bag) to where the charged one is kept.
-
7th February 2017, 01:17 AM #9
Re: First attempt at product photos - C&C Request
Hi Matthew!
Nice stuff you got going on here!
A couple of thoughts for your consideration?
With the leatherman tool? The lighting/angle thereof/camera angle is what is causing the numbers on one side to appear more and less prominently. In the actual camera left object the light is at an angle such that it is reflecting back into the lens effectively obscuring the numbers on that side. As the light falls off and is reflected less directly into the lens (due to the relationship of object/lens + falloff) the numbers appear more visible. The reason the numbers in the reflection are more visible is for the same reason. The surface is at a different angle in relation to the lens and so will not necessarily suffer the same reflection directly back to the lens. Again, as the light falls off from left to right, the numbers fall deeper into shadow in the reflection rendering them less visible. It is very difficult to have much lighting control where one needs it using umbrellas if one needs specific areas lit in a specific way.
Since you have advertised this as a product shoot Matthew I would suggest the composition of the multi-tool does not show it in all its glory. Perhaps a shot of the tool opened and the individual tools fanned out somehow would show off the tool and its attributes a little better.
As for the surface? I’m going to have to agree with the majority (so far) comments. The speckled surface is muddying your reflections causing them to look like there is a lot of dust on the surface. Further, the surface looks good outside the plane of focus, but inside that plane it shows causing a “band” of in focus speckles across the frame. This could probably be altered in post if one had a mind to.
While I am on the subject of plane of focus I would like to applaud your choice of focus stacking. This needs to be in every product shooter’s bag o’ tricks. Certainly if you are shooting with a macro lens on say, a jewelry shot or similar. If I had commissioned you to shoot a product of mine I would certainly want the option of my entire product being in focus and I would want the highest res possible for any print advertising I might want to do.
When I looked at the filter (#3) the first thing I noticed is that it appears to have no glass in it to me. Until I had a closer look I might have thought it was possibly a step down ring or something.
If this thought has any merit to you, the way to ensure that the glass appears to be there is to cause a highlight reflection on the glass. It appears you have it lit (at least partially) from behind and above according to the shadows. A nice gradient reflection on the glass from the back of the filter falling off toward the front would do the trick and show this is a filter with glass in it.

-
7th February 2017, 03:39 AM #10
Re: First attempt at product photos - C&C Request
I totally agree that black acrylic would be the choice in shooting these images. The first thing about shooting products is cleanliness and a dust free atmosphere. While I realize that the images are clean and dust free, the tile surface reflection looks dusty.
This is the site from which I purchased my acrylic. It is a bit more expensive than the site indicated above but, the shipping is free...
http://www.ebay.com/itm/30x30-Acryli...0AAOSw44BYHoZmLast edited by rpcrowe; 7th February 2017 at 03:47 AM.
-
9th February 2017, 06:39 AM #11
Re: First attempt at product photos - C&C Request
Thanks to everyone, I really appreciate the significant detail and time investment you all made in your replies. They were extremely helpful and very educational. I am definitely going to try again, using some of these tips.
Some thoughts and replies:
Regarding the tile surface - while I was initially very surprised one the consensus of a distracting surface, I can understand your reasoning. I chose the tile specifically because I liked the texture; my reasoning was that since I deal with nature photography, it seemed more natural of a surface, and less sterile. Your suggestion of a surface without texture makes sense now that I think about it, and I can see how you would want more focus on the product with no other distractions. It's similar to how I do my wildlife and nature photography - no distractions in the background - only the subject is the center of attention and the rest of the image is very clean, with a smooth, blurred-out background.I immediately noticed the distracting mottled look in the tabletop in all three images.
I also bought some tiles that look very similar to "stone." They are surprisingly realistic for being fabricated. I like the idea of a rock surface for some product images, again because I shoot nature photography, and I think the theme would work well on my blog. I shot a few images on them, but will need to try more compositions and angles to get something I like. Perhaps I'll post some shots in the future of that.
I avoided acrylic for two reasons: 1. I know it is easily scratched and the surface can be damaged if cleaned or stored improperly, and 2. it is a dust magnet. That said, I am willing to give it a try. I am lucky enough to have a specialty plastics shop about 10 minutes from home, so it should be no problem to pick up a sheet. (By the way, I am like a kid in a candy store whenever I go there)
Excellent point. I will try different lighting and angles to fix the issue. Until this was pointed out, I hadn't noticed. It's quite interesting how lighting and reflections work!it would be ideal for me if the numbers were easily visible throughout the length of the tool and its reflection.
This is a very interesting idea. How would you suggest I accomplish that? Are you suggesting using post-processing to "fade out" the bottom half of the reflection in a gradient of sorts?Consider displaying only part of the reflection for a composition that would be more dynamic (less static) for me.
I will try this and compare the results with my focus stacked versions.I would have used a focal length, aperture and distance between subject and camera that kept everything in focus and I would have then cropped to fill the frame with the subject.
Thanks for clarifying that. I wasn't sure what to call it - I will have to learn the terminology for things like this.I disagree that your reflector at the rear added a "glare look."
As a matter of fact, I did use a color checker and created a camera calibration profile. After getting the corrected base point, I slightly modified things manually in Photoshop as desired, creatively (for example, increasing saturation on the colors slightly). I understand that in commercial photography that might not be as acceptable, but for my purposes I think it's fine.Did you use a color checker or similar device to verify that the colors of your subjects are accurate?
Thanks for the suggestion. I tried opening the tools up a bit but couldn't get the composition I was going for, however I didn't consider a flat, top down approach (as can be seen in many photos of this product). I never looked at example photos of this tool, which I should have. That's a great idea for future product images that I create. I will also consider trying again to open the tools up and see if I can find a configuration that I like.Perhaps a shot of the tool opened and the individual tools fanned out somehow would show off the tool and its attributes a little better.
For my rechargeable AA and AAA batteries, I use cases just like these:RE: Battery storage cases
(Amazon Link)
http://a.co/fkz8Hiy
-
9th February 2017, 07:02 AM #12

- Join Date
- May 2012
- Location
- northern Virginia suburb of Washington, DC
- Posts
- 19,064
Re: First attempt at product photos - C&C Request
I like the idea of using real or imitation stone as a tabletop for the reason you mentioned. The reason the mottling in your images doesn't work for me is because the mottling is just faint enough to appear to be a mistake and not distinct enough to appear intentional. Be aware, though, that the stone probably will not be as reflective as your floor tile or black acrylic unless the stone is highly polished. If it is highly polished, it will have the man-made appearance rather than the natural appearance that justifies the use of stone in the first place. If using a reflection isn't an important part of your composition, you of course will have more flexibility with regard to tabletop materials.
To display only part of the reflection, I was thinking of either using a composition at the time of capture that excludes part of the reflection or cropping later to make that happen. I often include more of the reflection at the time of capture than I think I will ultimately include. That's because it's one heck of a lot easier to subtract content from a captured scene than to add content to it.
One quick tip that can make all of your product photography a little more interesting is to use a fairly heavy vignette either created by your lighting or your post-processing. Another technique is to light the tabletop so it displays a gradient. The gradient can be top to bottom, side to side or on a diagonal. I confess to being a sucker for diagonals.
Consider adding red text accompanied by a red arrow pointing to the rubber band explaining what the rubber band indicates. It's pretty difficult to make an image of batteries seem interesting unless you go into high-fashion mode, so adding that text might help spruce up the subject matter a little bit.
-
9th February 2017, 09:03 AM #13

- Join Date
- Jun 2016
- Location
- lancashire uk
- Posts
- 224
- Real Name
- roy
Re: First attempt at product photos - C&C Request
Personally I would get rid of the reflection altogether. It's just the product I want to see. I would also agree with Terry the tool needs to be opened out.
Roy
-
10th February 2017, 04:47 AM #14
Re: First attempt at product photos - C&C Request
Mike, thanks for the follow up reply. Very good input and tips which I will utilize.
Thanks again to everyone.

 Helpful Posts:


 Reply With Quote

