
Epoxies by JOHN, on Flickr
I've been working with epoxy coatings lately and am displaying a few test applications. The first and second were coated with Artresin and the one on right with Mod Podge. There is a coating applicator calculator that tells how much Artresin should be applied for a 1/8" coating, I thought it was a bit much so decreased the amount; hence the look of a wave on the first image.
Regarding the shooting of the display, I used a daylight bulb for light source, I set the camera at 1sec, ISO 80, f/8. The glossy look of the third was intentional to show the actual coating. For editing of the posted image I used the following settings in ACR: sharpening radius 0.5, amount 141, NR 41 luminance 24 lum. detail, color and color detail 25. The WB as shot displayed 5300 K and I switched to Daylight 5500. I used Auto Exposure which applied:
Exp. +0.80, contr. -24, shadows +9, whites +37, blacks -18
In Elements I did a bit of cloning for spots and fixing the white border and cloning out poster clips. Comments welcome, especially on settings for shooting imagery to be displayed online.
 Helpful Posts: 0
Results 1 to 3 of 3
Thread: A Bit of This and That
-
22nd April 2018, 01:46 PM #1


- Join Date
- Dec 2009
- Location
- WNY
- Posts
- 36,716
- Real Name
- John
A Bit of This and That
-
22nd April 2018, 02:07 PM #2Moderator

- Join Date
- Mar 2012
- Location
- Ottawa, Canada
- Posts
- 22,284
- Real Name
- Manfred Mueller
Re: A Bit of This and That
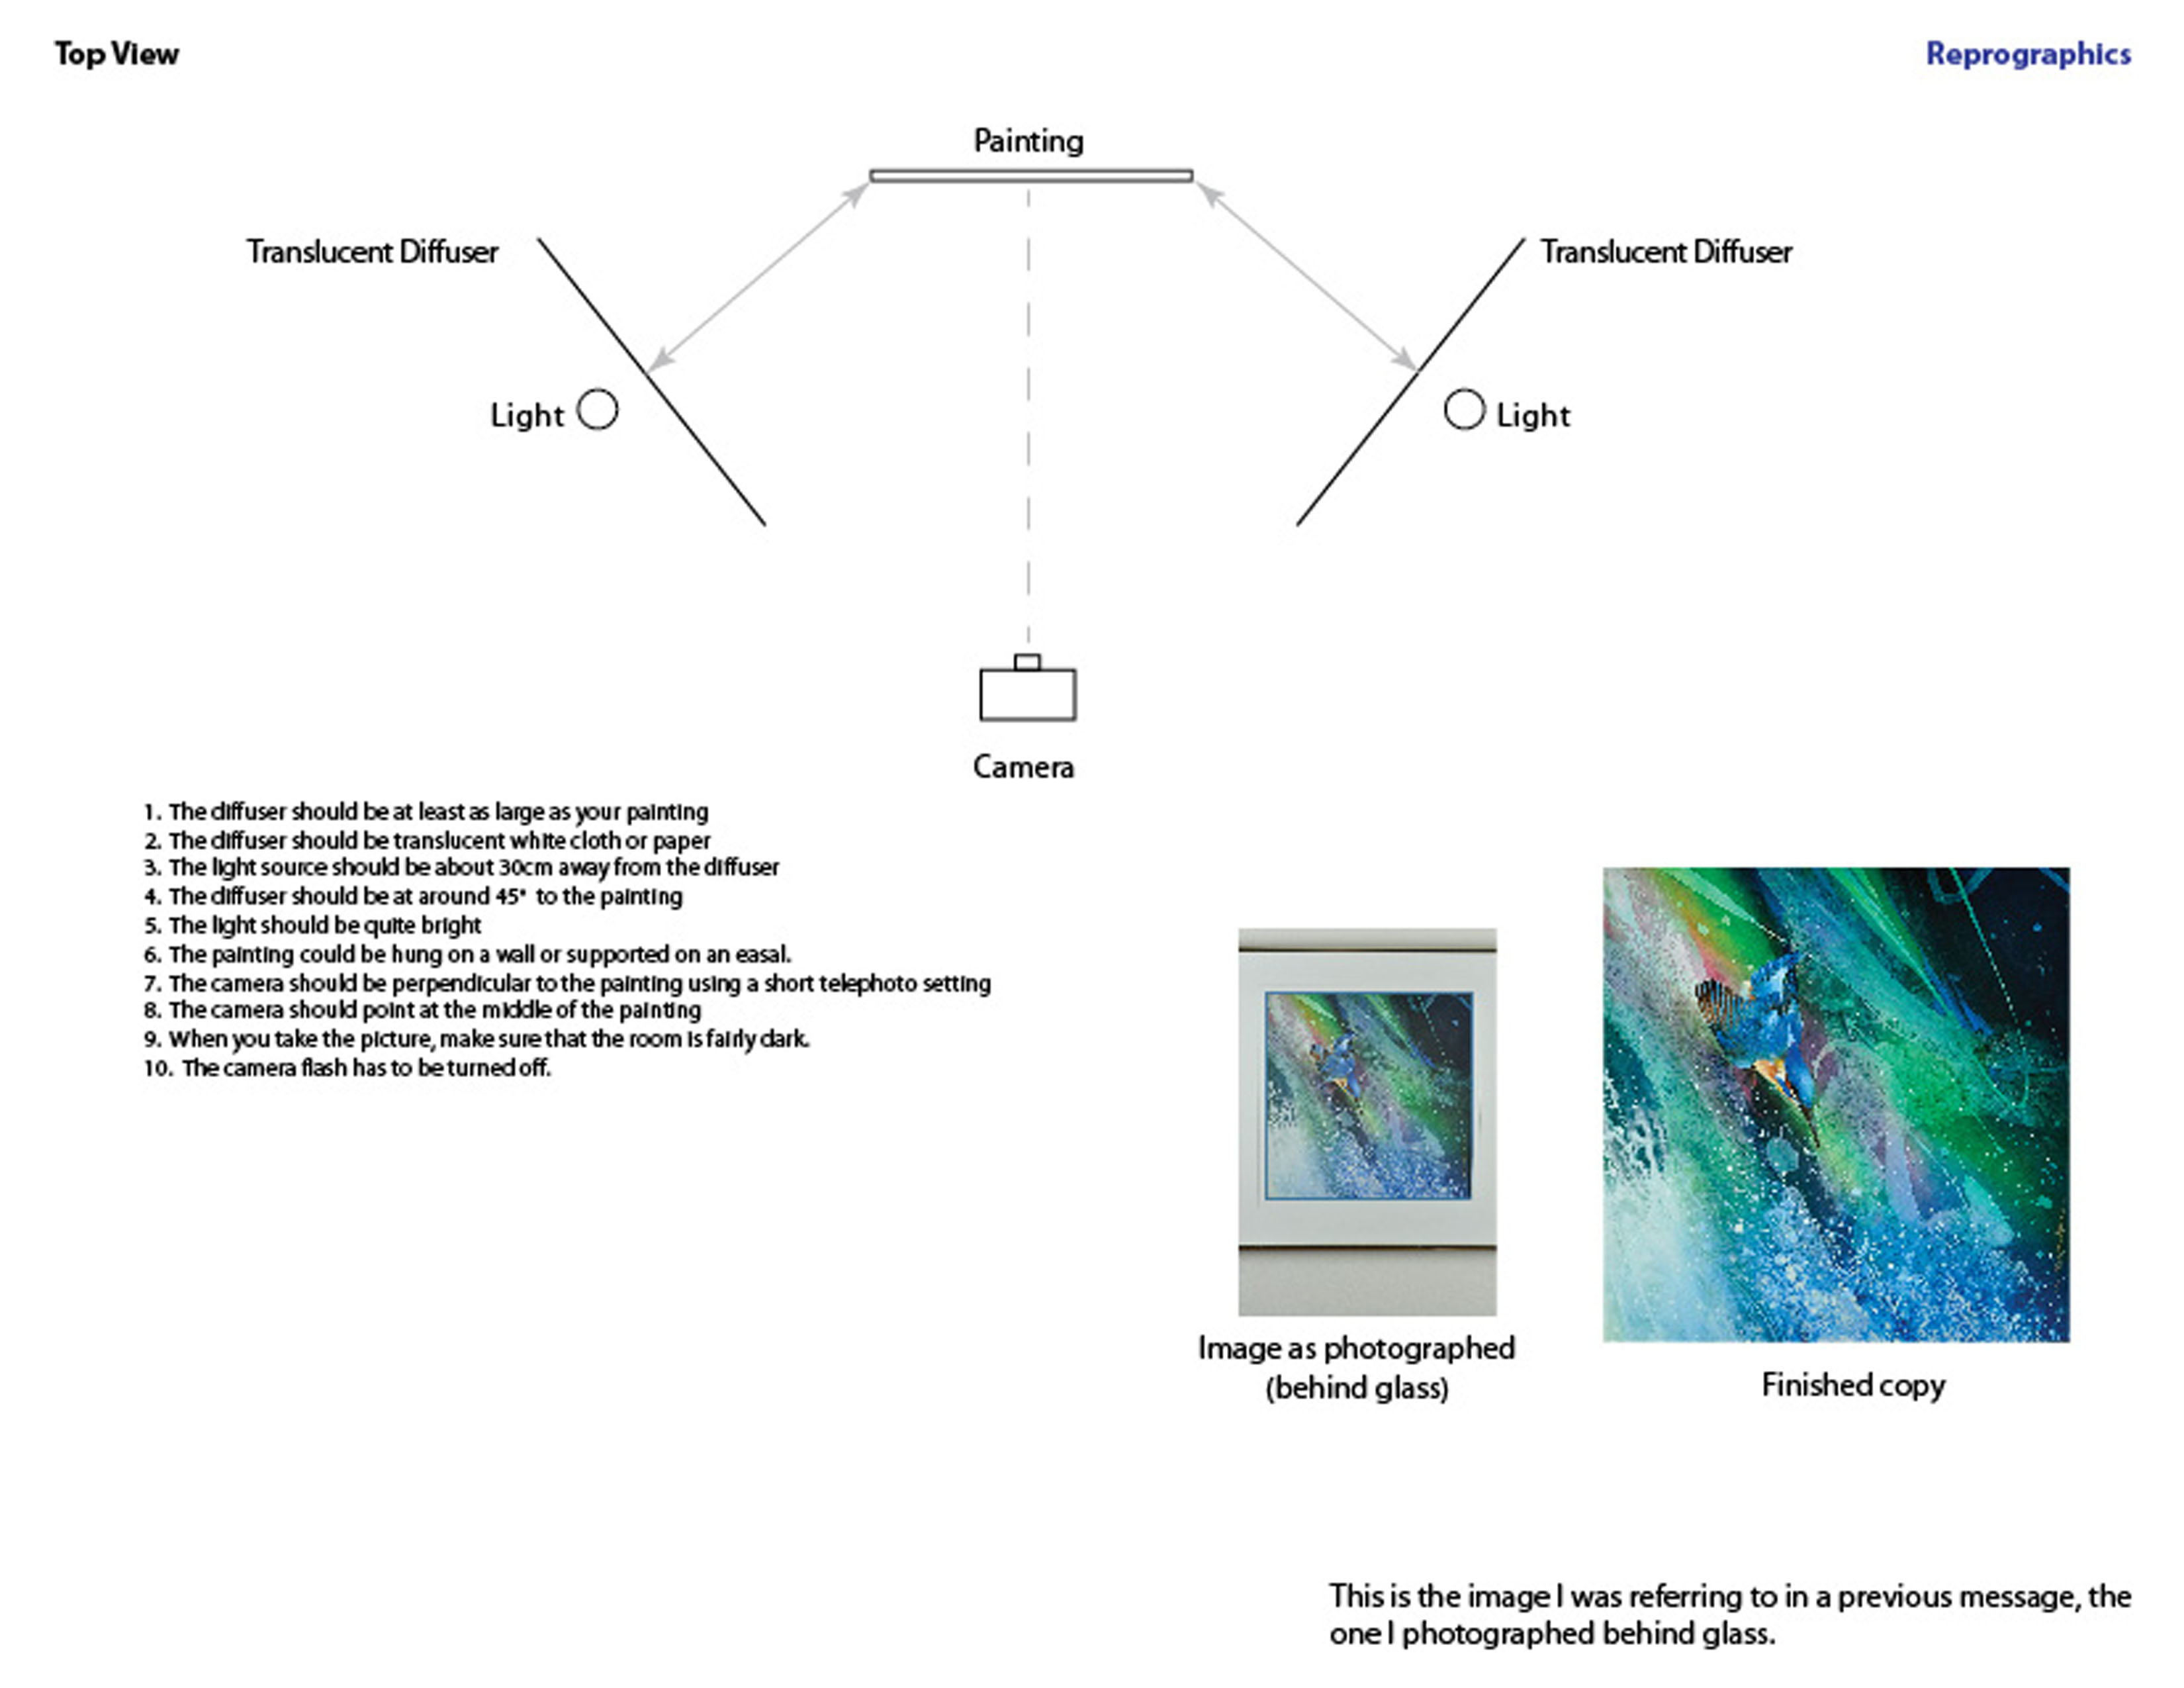
Shoot in a darkened room and use a setup as in the diagram below. I use studio lights with softboxes when I do reproduction photography as it is fairly easy to set up and take down. The angle the light is coming from and the distance of the light sources from the subject are fairly important. Having the camera square to the subject is as well. You may need to block the light sources with flags if the setup means that some of the direct light hits the front of the lens.
What you do want is even lighting from top to bottom and left to right.
The image I show in the picture is behind glass and there is no reflection. I have also used this technique to photograph varnished oil paintings that are going to have reflective patterns more in line with your coated photos.
-
22nd April 2018, 02:14 PM #3
- Join Date
- Dec 2009
- Location
- WNY
- Posts
- 36,716
- Real Name
- John
Re: A Bit of This and That
Manfred,
Thanks for the diagram and suggestions, I had only one light source placed lower left, I also positioned a bit further back to see if it lessened the reflection and it did on a few shots. For your suggested lighting setup I'll need another light source, I did try bouncing light with an external flash but that gave me two different light sources. I'll also need some diffuser panels.


 Reply With Quote