Results 21 to 40 of 57
-
11th October 2019, 05:55 AM #21

- Join Date
- Feb 2012
- Location
- Texas
- Posts
- 6,956
- Real Name
- Ted
Re: 2019 - P52 - 4th Quarter - David (Rufus) - Merging / using multiple images
-
11th October 2019, 06:04 AM #22
Re: 2019 - P52 - 4th Quarter - David (Rufus) - Merging / using multiple images
-
11th October 2019, 06:06 AM #23

- Join Date
- Feb 2012
- Location
- Texas
- Posts
- 6,956
- Real Name
- Ted
-
11th October 2019, 12:25 PM #24
Re: 2019 - P52 - 4th Quarter - David (Rufus) - Merging / using multiple images
I'm guessing that you will find the Lightroom option satisfactory, at least to start. So far--I haven't used it all that much yet--I have been pleasantly surprised by it. I haven't yet seen any of the color distortions that I experienced with the HDR bundled with Photoshop. However, it doesn't give you much control.
An alternative, if you like working in Lightroom, is the Lightoom Enfuse plugin. The two packages it uses are used more generally outside of Lightroom, but they have been packaged into a nice plugin that is easy to use (although not so easy to install). The default settings usually work well, but they can be adjusted to taste, unlike Lightroom's Merge to HDR. Still not as much control as manually blending, of course.
I was intrigued by your comment about the complexity of doing manual merges in Photoshop. I only knew one way to do this, but there are a bunch. I found a clear basic intro to some of them here.. At some point, when I have time, I will experiment with more of them.
-
11th October 2019, 04:44 PM #25

- Join Date
- Feb 2016
- Location
- Cambridge, UK
- Posts
- 928
- Real Name
- David
-
20th October 2019, 06:25 PM #26

- Join Date
- Feb 2016
- Location
- Cambridge, UK
- Posts
- 928
- Real Name
- David
Re: 2019 - P52 - 4th Quarter - David (Rufus) - Merging / using multiple images
Week 42 - Focus stacking excercise
There is nothing to report for week 41, but this week I have practiced focus stacking. The composition and lighting was not important to me but the focus stacking technique was.
The camera with remote release was placed on a tripod and I set the lens to manual focus, used live view, and enlarged the preview for greater detail when manually focusing. (I do not have a focus rail).
I used a wide aperture (f/4) to reduce the depth of field so that focus stacking would be required for overall sharpness. The camera was approximately 6 feet / 1.8 metres from the subject so the DOF should be about 1.5inches / 4cm.
I then shot 13 images focusing on various parts of the subject such as the glass, the box and various areas of the labels and bottles.
Having taken them, my workflow was as follows.
1. Import images to LR with no adjustments on import
2. Select all the images in the Develop module
3. Export from LR into PS as layers
4. Select all layers
5. Auto align layers
6. Select all layers
7. Auto-Blend Layers
8. Some curves adjustments on the merged image
9. Crop foreground just to tidy up the image
10. Save merged file back into LR
I have not used lens correction or digitally sharpened the images at any stage.
Exposure for all images: 1/20 sec at f/4 and ISO 100. Lens used: 135mm f/2 prime
#89 The final result (merge of 13 images):
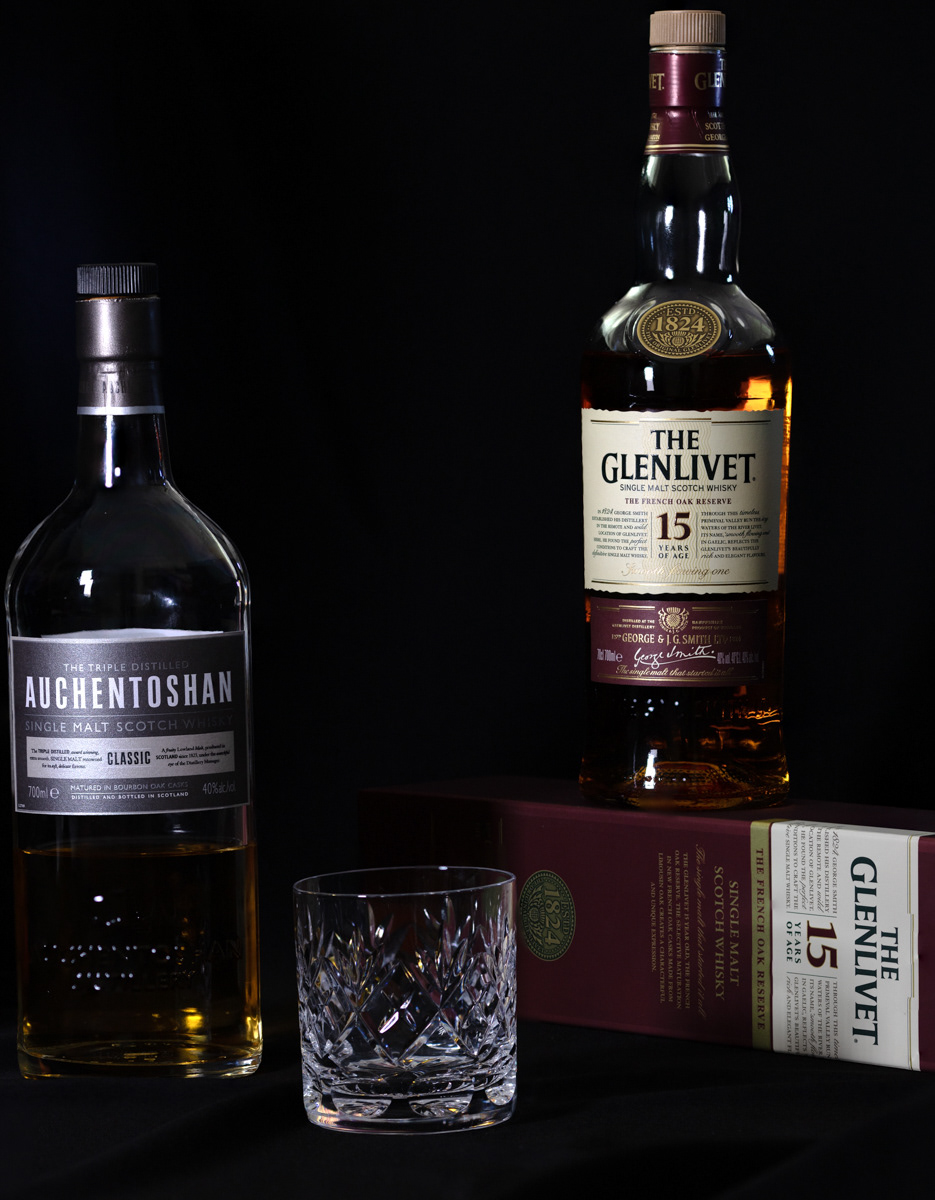
Examples of the individual images and where I focused:
#89-A The black lettering of the box
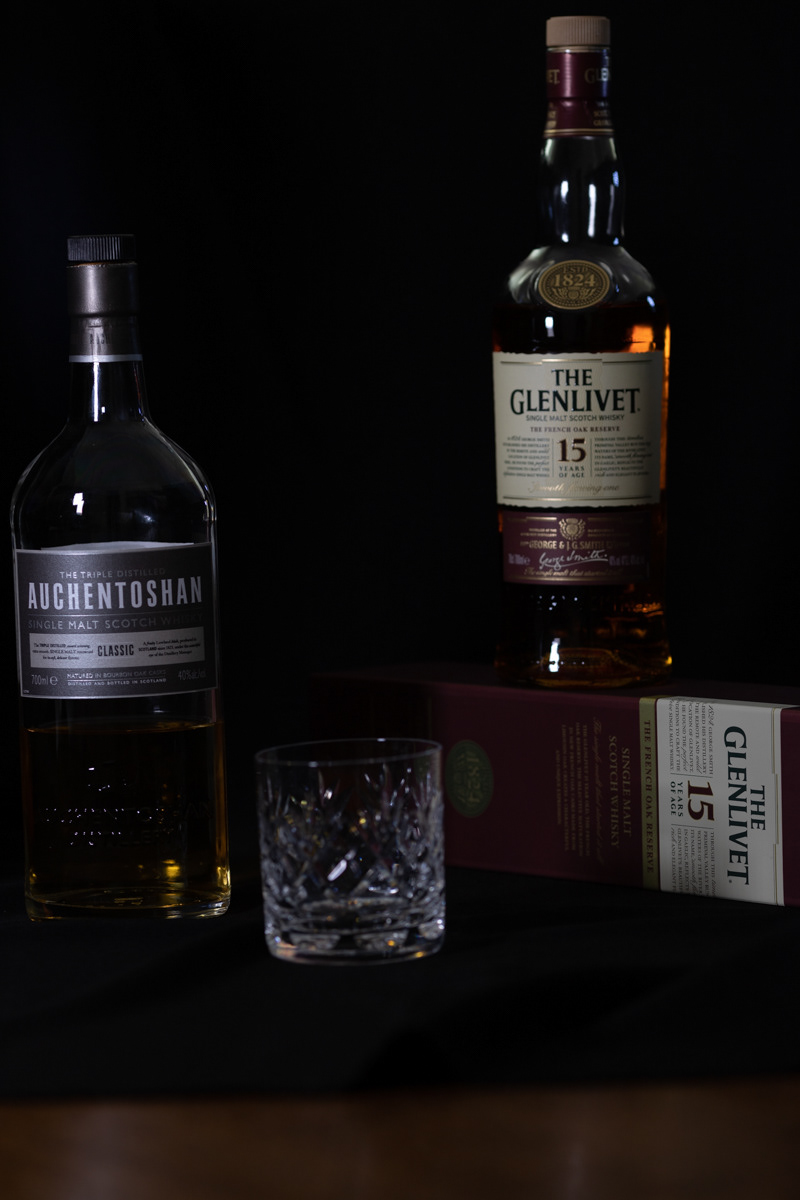
#89-B Front of glass
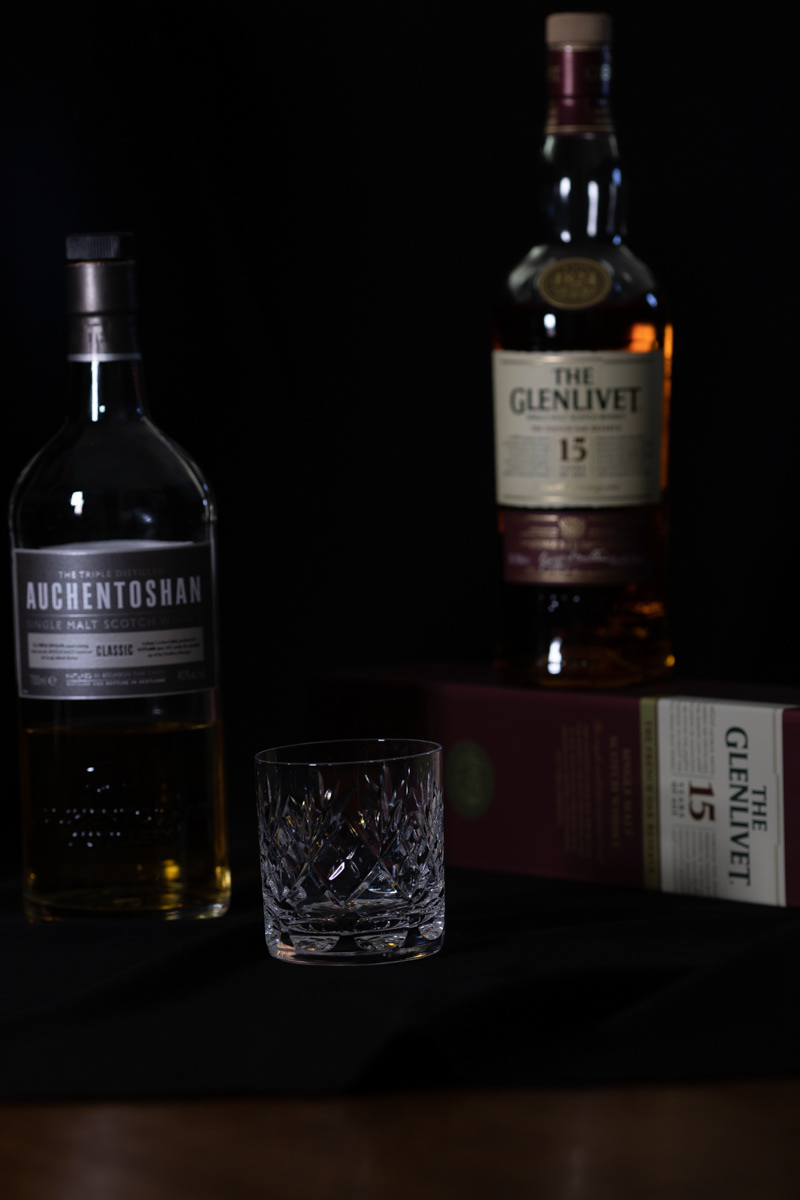
#89-C Front of Auchentoshan label
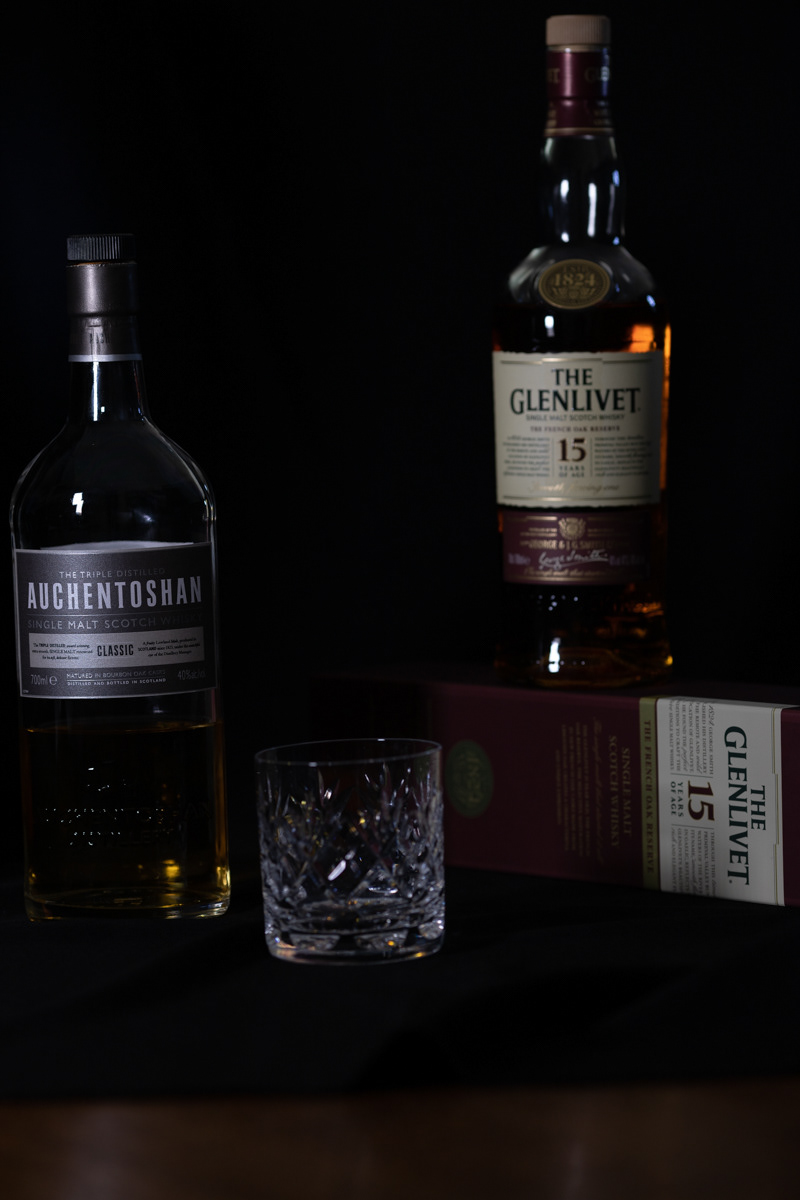
#89-D Stopper of Glenlivet bottle
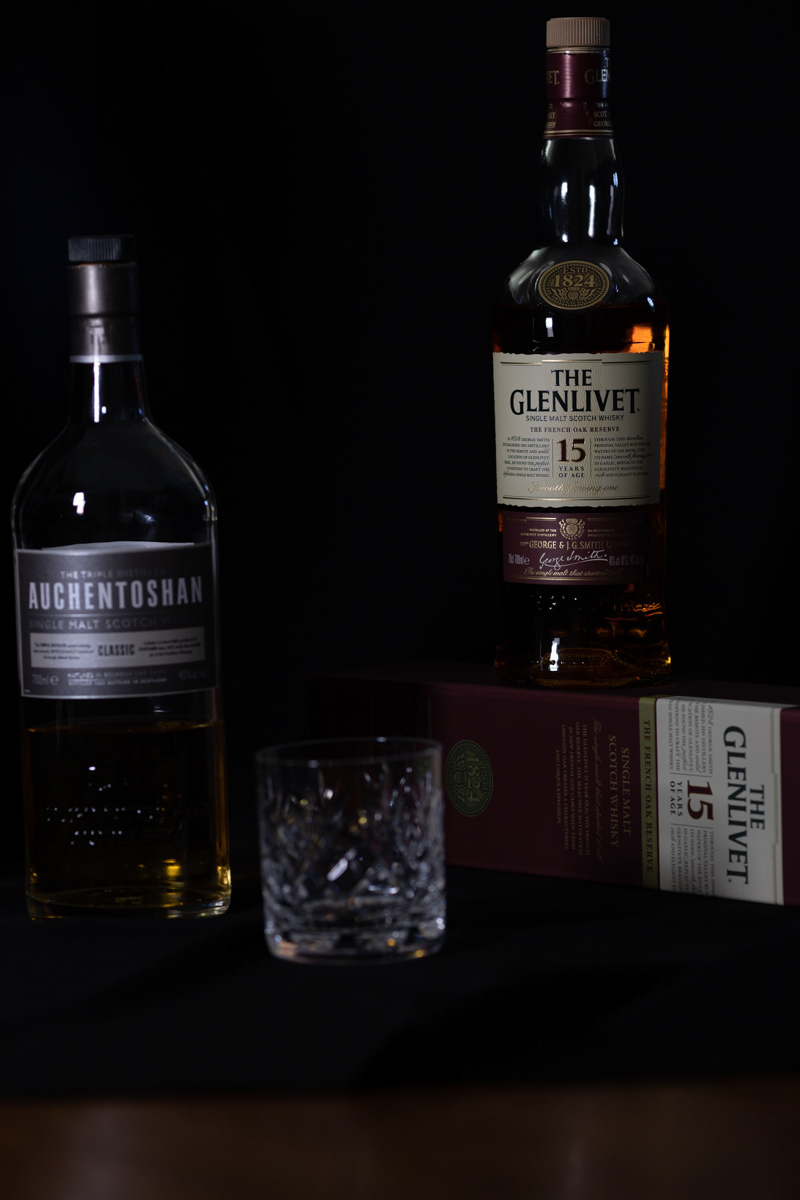
Comments, particularly on the focus stacking technique, are welcome.
-
20th October 2019, 06:49 PM #27

- Join Date
- Feb 2012
- Location
- Texas
- Posts
- 6,956
- Real Name
- Ted
Re: 2019 - P52 - 4th Quarter - David (Rufus) - Merging / using multiple images
#89 looks pretty good to me at a glance.
I have a focus rail but don't use it much. In your scene, changes in perspective might become significant:You said: I set the lens to manual focus, used live view, and enlarged the preview for greater detail when manually focusing. (I do not have a focus rail).
https://www.photigy.com/school/the-b...cus-variation/
Focus Stacking: Lens focusing or Rail focusing
Dan K can contribute more, I reckon ...
-
20th October 2019, 07:43 PM #28

- Join Date
- Feb 2016
- Location
- Cambridge, UK
- Posts
- 928
- Real Name
- David
Re: 2019 - P52 - 4th Quarter - David (Rufus) - Merging / using multiple images
Ted - thank you for the links which make interesting reading.
Following one of the links within your first link led me to http://zerenesystems.com/cms/stacker...ringversusrail which very usefully suggests when ring or rail might be the better option. In essence, the lens focussing ring is normally to be preferred unless the camera is very close to a small subject.
My subjects were not small and I was 6 feet away so manually focusing the lens, as I did, would have been the best solution. I conclude that I wont need to think about a focusing rail unless I acquire a macro lens and that is not my intention at present.
I then read the earlier thread via your second link which is also very informative and leads to the same conclusion. However, it also makes the point, if I read it correctly, that a rail can assist with framing when close to the subject, even if the lens ring is actually used for focusing; but I still wont be buying one for now!
-
20th October 2019, 11:42 PM #29
Re: 2019 - P52 - 4th Quarter - David (Rufus) - Merging / using multiple images
Nice output.
-
21st October 2019, 12:00 AM #30
Re: 2019 - P52 - 4th Quarter - David (Rufus) - Merging / using multiple images
I don't see any artifacts, but the image is a little too small to be certain.
Re the procedure: I have only used Photoshop for stacking once or twice, and that was years ago, so I can't be certain, but your procedure looks right to me.
Re focusing with a rail vs. the lens barrel: I believe you are exactly right. I think Rik Littlefield, the author of Zerene, once wrote that if the subject is larger than a raisin, don't focus with a rail. The problem with a rail is that it moves the entrance pupil of the lens. That affects different stacking algorithms differently, which is a problem if you use both of Zerene's two methods for one image (which I often do). To see an explanation by the photographer who first found this, see https://www.youtube.com/watch?v=mzVD95-9YOU.
This assumes that you use a rail the simple way: simply mounting the camera on it and moving the camera and lens together. Moving them separately, with a bellows between them, is a whole different matter.
Re using a rail to frame the subject: I do that. One problem with macro (less so with a subject as large as yours) is that even small movements can ruin the framing. It is very hard to move the camera just the right amount without overshooting. So, I use a geared head for fine control of rotation in all three planes, and I mount a focusing rail on top of that to make it easy to make small front-to-back adjustments for the first shot in the stack. Manfred recently posted information about a Benro geared head with is lighter and cheaper than the Manfrotto I use and also comes with an arca-swiss compatible clamp.
BTW, Zerene is an excellent stacking package. I have used a few software packages for stacking, but once I tried Zerene, I stuck with it.
-
21st October 2019, 03:26 AM #31
Re: 2019 - P52 - 4th Quarter - David (Rufus) - Merging / using multiple images
David - why are you shooting these at f/4? With a scene that requires a reasonable DoF, I would have jumped straight to f/11 or even f/14 to see how well the scene works without having to resort to stacking. I can see why you would want to do this as a learning exercise, but...
From a compositional standpoint, I'm trying to understand why you went with such a tight crop? I'm not sold on the lighting either; the label on the camera left bottle is too "hot" and bottom of the Glenlivet box could use a lot more light and the hot spots here are there are distracting. One trick when shooting bottles is to remove the labels on the back to ensure that they don't reflect the light back.
While not 100% on topic (it covers beer, not whisky), this is a very good tutorial that you can get for free, but you have to sign up at the website:
https://proedu.com/collections/avail...d-beer-bottles
-
21st October 2019, 08:48 AM #32

- Join Date
- Feb 2016
- Location
- Cambridge, UK
- Posts
- 928
- Real Name
- David
Re: 2019 - P52 - 4th Quarter - David (Rufus) - Merging / using multiple images
Dan - thank you for your comments.
The video provides an excellent buyer's guide to selecting a focus rail, and some of the pitfalls; and I was not aware of the concept of keeping the lens static but moving the camera when using a bellows.
-
21st October 2019, 09:32 AM #33

- Join Date
- Feb 2016
- Location
- Cambridge, UK
- Posts
- 928
- Real Name
- David
Re: 2019 - P52 - 4th Quarter - David (Rufus) - Merging / using multiple images
Thank you for your comments, Manfred.
It was just an exercise to use the focus stacking technique, so I selected f/4 on purpose to ensure that each image had insufficient depth of field to cover the whole subject matter.
As a pure exercise in focus stacking I was not too bothered about the composition. I accept and agree with your critique of the composition and lighting.
Thank you for the tip about removing the rear labels. Could you expand on this to explain what effect that is having in my image; is it more than the rear label that is evident above the front label on the left hand bottle, or is there evidence of reflected light elsewhere?
Judging by the introductory sample, this looks like a great resource.
-
21st October 2019, 12:20 PM #34
Re: 2019 - P52 - 4th Quarter - David (Rufus) - Merging / using multiple images
When I stack, I typically use f/7.1 or so. It gives me a little more leeway to avoid accidentally failing to have shots close enough together.so I selected f/4 on purpose to ensure that each image had insufficient depth of field to cover the whole subject matter.
In general, there are 4 things to check at the outset in evaluating a stack:
1. Did you include images far enough to the front of the stack, so that the front is in crisp focus?
2. Did you include images far enough to the back?
3. Do you have any gaps, regions (front to back) where you don't have any image in focus?
4. Do you have halos?
The locations of 1 and 2 are usually easy to find. #3 can be anywhere at all. #4 most often arises when there is a large distance, front to back, between an edge in front and whatever is behind it. An example of a place to look is circled in this clip:

-
21st October 2019, 01:08 PM #35

- Join Date
- Feb 2016
- Location
- Cambridge, UK
- Posts
- 928
- Real Name
- David
Re: 2019 - P52 - 4th Quarter - David (Rufus) - Merging / using multiple images
I can appreciate why more depth of field is desirable, and I imagine that when stacking macro shots of small items one might well need both a small aperture and a larger number of images. In this execrise I did not want to have the leeway provided by a smaller aperture/wider DOF. It may be that, as a result, I did not shoot a sufficient number of images to cover the required depth of field.
These are 4 good points. Thank you for explaining where halos are most likely to occur. I will know to look out for these in future, but presumably they only appear once stacking has taken place.
As an aside, it now occurs to me that for this type of photography I could use the "remote live view shooting" function via the Canon Connect app on my iPad.
-
21st October 2019, 01:18 PM #36
Re: 2019 - P52 - 4th Quarter - David (Rufus) - Merging / using multiple images
The issue is that labels are glued onto bottles and are often a white or light colour. When light hits them, they reflect and cause strange effects inside the bottle where they scatter light. Sometimes this results in a strange glow inside the bottle with the contents and sometimes we see this picked up in the glass.
While you have identified the same issue I did on the camera left bottle, there is also something strange on the right hand side of the camera right bottle that could be reflected light from the label.
-
21st October 2019, 03:37 PM #37

- Join Date
- Feb 2016
- Location
- Cambridge, UK
- Posts
- 928
- Real Name
- David
Re: 2019 - P52 - 4th Quarter - David (Rufus) - Merging / using multiple images
Yes that is looking strange now you have pointed it out. It is probably associated with a light from a small source that was positioned fairly close to that side of the bottle and slightly higher than the top of that bottle. The pale colour of the liquid may be light reflected from the label(s) or internally from the far side of the bottle itself.
-
28th October 2019, 04:55 PM #38

- Join Date
- Feb 2016
- Location
- Cambridge, UK
- Posts
- 928
- Real Name
- David
Re: 2019 - P52 - 4th Quarter - David (Rufus) - Merging / using multiple images
Week 43 Another practice session at focus stacking.
This week I used the same lens as last week (135mm prime) but a smaller aperture (f/8). The shots were taken at a distance of approximately 40 inches / 1 metre. The depth of field should be +/- ½ inch / 1.2 cm but that still seemed optimistic when I actually came to focus on different parts of the subject.
I could have used f/11 but, as last week, I wanted to be sure that focus stacking would be required; and the subject was smaller than last week so, overall, less depth of field would be needed for this weeks subject.
My general approach was the same as last week, focusing on various part of the image in turn. That may mean that I took more than one image at or very close to the same focal distance if parts of the scene happened to be in the same plane. My assumption was that it would be better to have too many images than too few. I focus stacked 35 images in all, which does seem excessive!
I am fairly pleased with the final result despite some clipping at both ends, but I dont think it detracts from the image.
The lighting was problematic as I have very limited resources on that front. I wanted to avoid to much shadow inside the egg, which would favour a light in line with the camera. However, I also wanted to give a sense if depth to the miniature arrangement inside the egg, which would favour side lighting. I ended up using a main light fairly close to the camera with a small closer light on the right hand side, plus some diffused ambient daylight which was probably insignificant.
The stacking was done in Photoshop and I was surprised to find that when I went to save the stacked file with all the 35 layers and masks, back to Lightroom a message appeared saying that I could not do this as there is a 2GB file size limit when saving or exporting from Photoshop. I therefore merged the layers that had the masks into the merged layer generated by Photoshop and retained the other adjustment layers for the future.
#90 Decorated Egg (1/4 sec - f/8 - ISO 125 135mm prime lens):
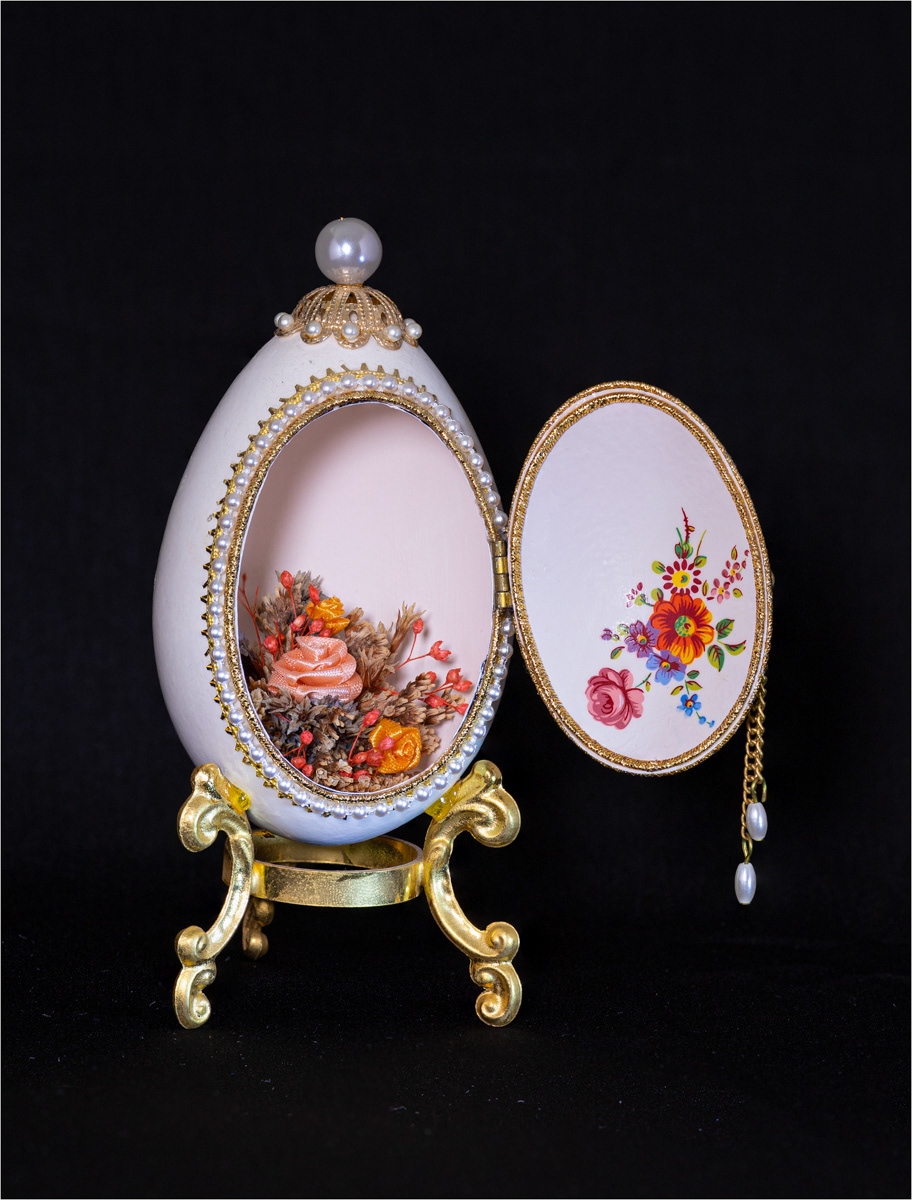
C & C are always welcome.
-
28th October 2019, 05:36 PM #39
Re: 2019 - P52 - 4th Quarter - David (Rufus) - Merging / using multiple images
The Adobe psb file format is limited to being less than 2GB. There is an psb (large document format) format that saves larger files. I seem to remember that TIFF also allows files larger than 2GB.
My question is to why you are looking to "round trip" to Lightroom. That is a bad practice if you are planning to do more editing work as the algorithms used by the two pieces of software are not 100% compatible and can result in strange and difficult to diagnose problems. If all you are doing is re-sending it to Lightroom to use some other functionality, like printing, that seems to work quite well.
-
28th October 2019, 09:23 PM #40

- Join Date
- Feb 2016
- Location
- Cambridge, UK
- Posts
- 928
- Real Name
- David
Re: 2019 - P52 - 4th Quarter - David (Rufus) - Merging / using multiple images
Adobe says Like most file formats, PSD supports files up to 2 GB in size. For files larger than 2 GB, save in Large Document Format (PSB), Photoshop Raw (flattened image only), TIFF (up to 4 GB), or DICOM format.
A single image imported from my cameras RAW file straight into Photoshop and immediately saved as in the PSD format can take up approximately 66MB. So 4GB would cater for say 60 layers in the worst case scenario of each layer taking up as much space as the original layer. This may apply to stacking but adjustment layers masks etc presumably take far less. So, a TIFF might well be a suitable solution if I come across this in future.
I read that there can be compatibility issues with psb files, but it seems to be about backward compatibility and applications that dont support layers.
This link, although concentrating on panoramas, provides some useful information on the file size limitations of applications as well as file formats. At the time Lightroom could handle only 0.5GB and I have not found more up to date information.
I manage my files in Lightroom and print from there. I will often do some global adjustments there using just the Basic panel and then use Photoshop for anything else. I have not noticed any difficulty with this workflow so far.

 Helpful Posts:

 Reply With Quote
